
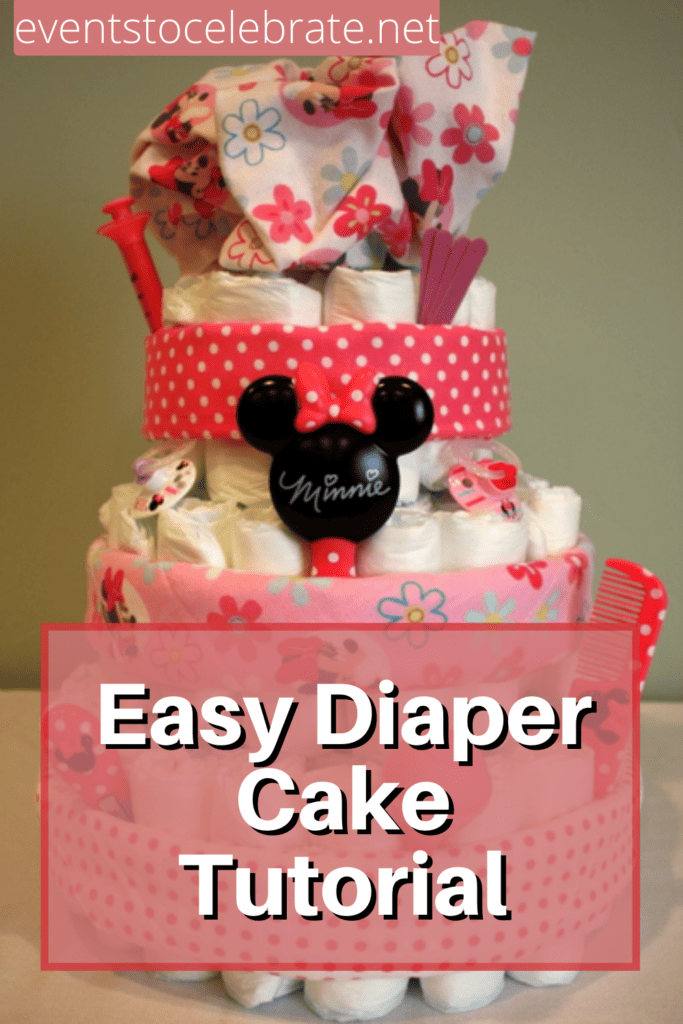
Diaper Cake Tutorial
This post may contain affiliate links, including Amazon Associate links. As an Amazon Associate, I earn from qualifying purchases at no additional cost to you. Please see my Disclosure Policy for more details.
I still remember the first time I made a diaper cake for a baby shower. It was before the days of Pinterest and YouTube tutorials. It was kind of a disaster. I had seen one in a photo and figured it couldn’t be that difficult, but it took me a little while to figure out how to get everything to stay together. Let me give you a few tips that will help you put one together.
Diaper Cake Tutorial
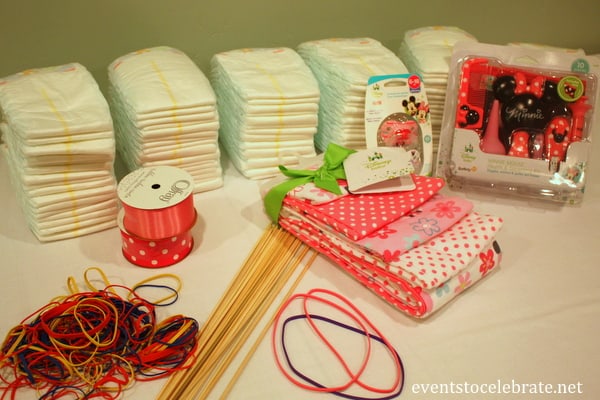
Supplies Needed:
– Approximately 100 Diapers![]()
– 100 Small Rubber Bands![]()
– 3 Large Rubber Bands![]()
– 3 – 4 Bamboo Skewers
– Ribbon (I used Minnie Mouse Flannel Blankets![]()
instead)
– Baby Products for Decoration (like this Minnie Mouse Grooming Kit![]() )
)
Step 1:
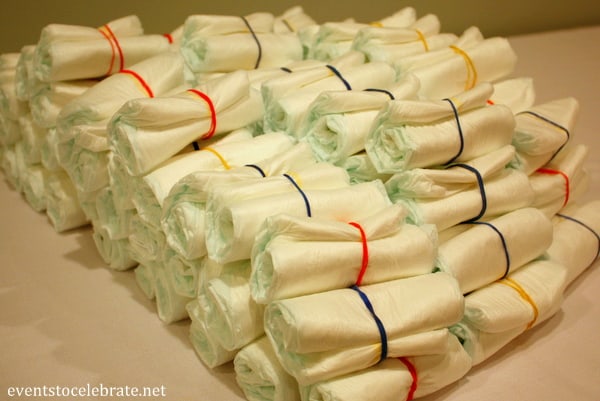
Roll each diaper starting at the open end and secure with a rubber band.
Step 2:
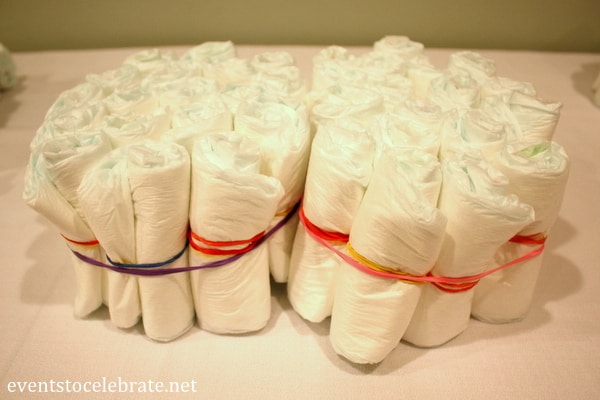
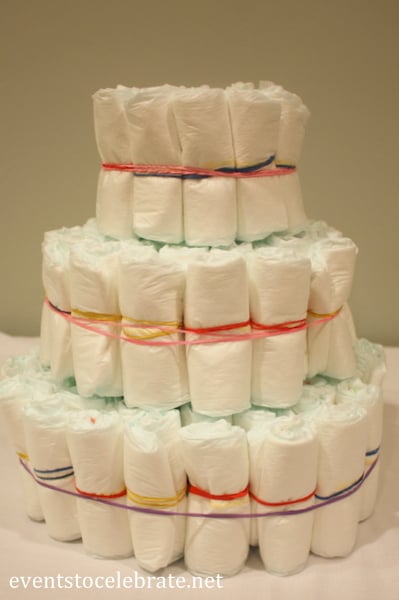
Method A – Start with a group of diapers (5-7) that you are able to hold in one hand and put a large rubber band around them and stand them up. Stretch the side of the rubber band as you insert 2-3 more diapers at a time until you have as many diapers in that “layer” as you want.
Method B – Put a large rubber band around groups of 7-10 diapers and stand them up side by side. Stretch a large rubber band around the groups to create one large round. Then, you can take the large rubber bands off of the individual groups.
Mold the diaper rounds into a nice circle, and if it is a small layer – you may be able to stretch the rubber band around the circle one more time to make the hold even tighter.
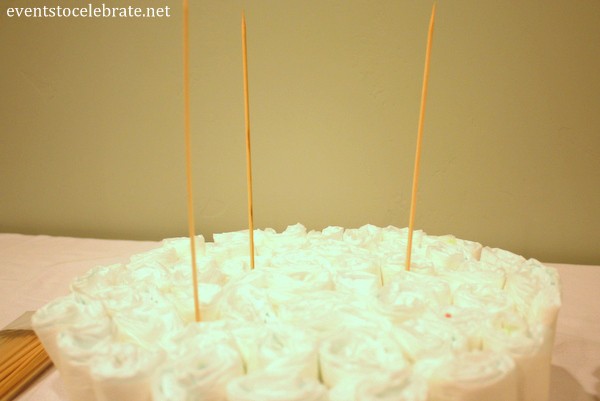
Step 3:
Starting with your base layer (I used 50, 35 & 15 diapers in my layers) stick a few bamboo skewers down through the slots, all the way to the bottom. Then carefully wiggle the next layer over the skewers (they are adding stability), and finally the third layer.
Step 4:
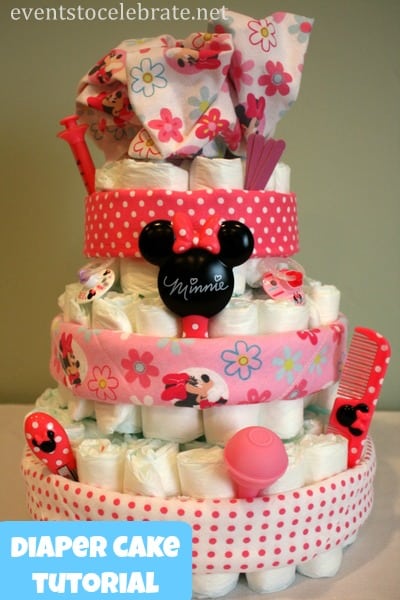
Once you’ve got all three layers stacked, it’s time to decorate! You can wrap ribbon around the center of each layer (to hide all of the rubber bands). For this cake I took thin receiving blankets, rolled them up and wrapped them around each layer, securing the ends with a rubber band in the back. For the topper I took the 4th blanket that came in the package and bunched it up like a bouquet and used a rubber band to hold the “handle” of the bouquet. Then I pushed the handle down into the center of the top layer. For extra fun detail, I added items from a grooming kit and a few pacifiers.
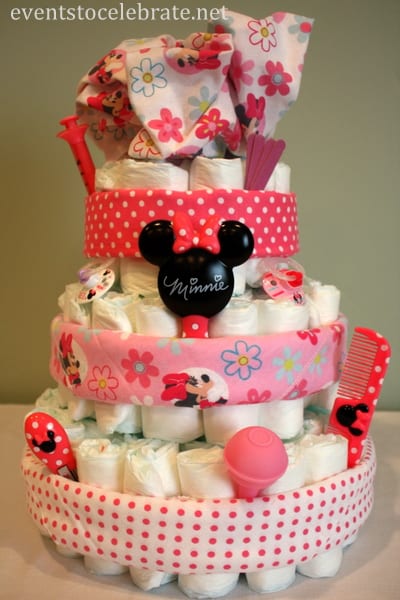
These make a GREAT centerpiece at a baby shower and best of all, the mom-to-be gets to take home the whole thing! In total this one cost me $35 to make.
See the entire Minnie Mouse Baby Shower HERE!
Want more Baby Shower Ideas? Check out the Celebrations & Showers tab at the top of the page!