
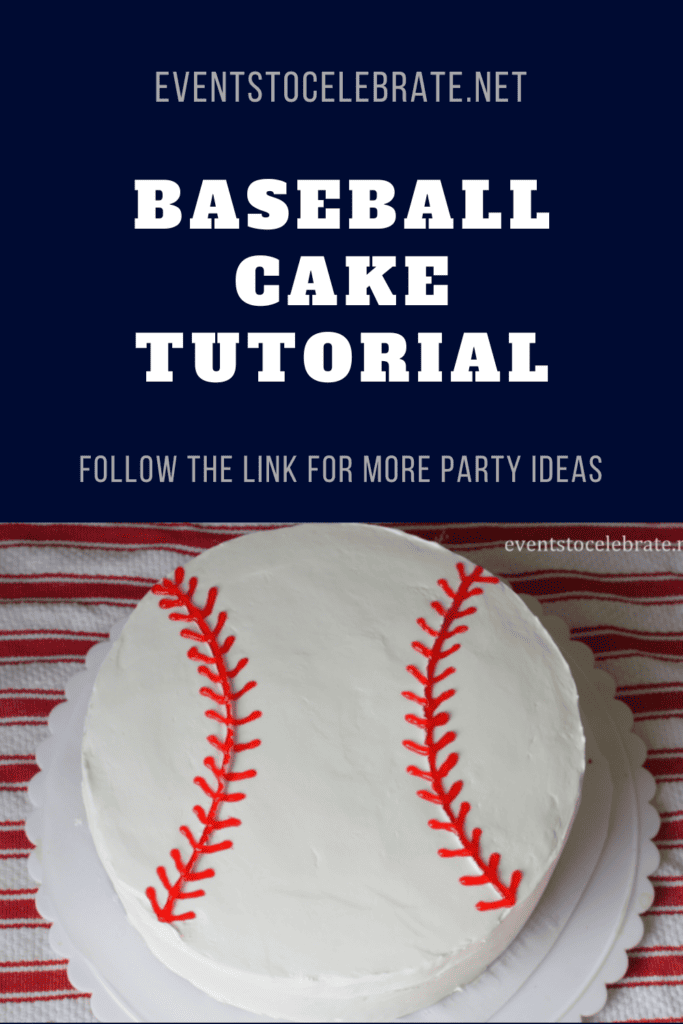
Easy Baseball Cake Tutorial
This post may contain affiliate links, including Amazon Associate links. As an Amazon Associate, I earn from qualifying purchases at no additional cost to you. Please see my Disclosure Policy for more details.


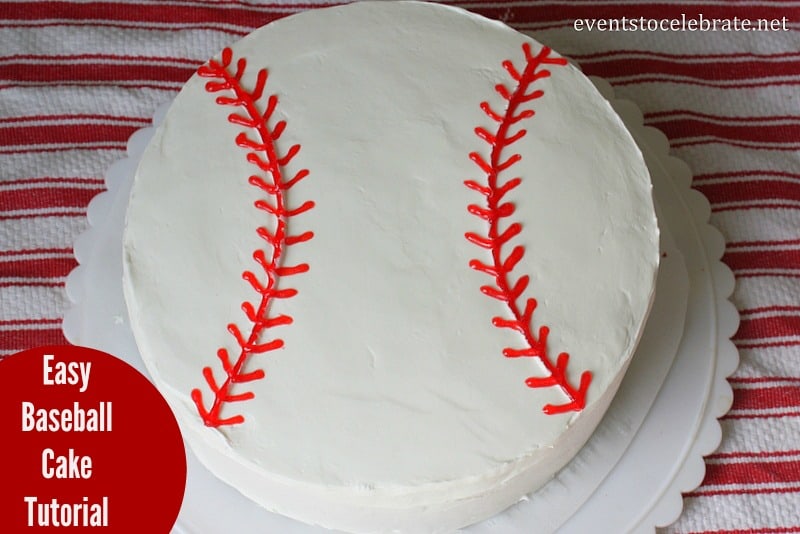
Simple and adorable baseball cake tutorial!
If you are looking for an easy-to-follow baseball cake idea, then you have come to the right place!! In this blog post, I will give you a list of needed ingredients, step-by-step instructions WITH pictures, and tips for making this cool birthday cake.
Let me be the first to say that you can have basic baking skills and still make this cake look amazing. It is THAT easy! I would know. After years of planning my kids’ birthday parties, you would think I had become this incredible baker with state-of-the-art cakes and designs. However, I am just like you. I can follow a recipe, go off of pictures, and be “the best mom” for making my kids’ birthday dreams come true.
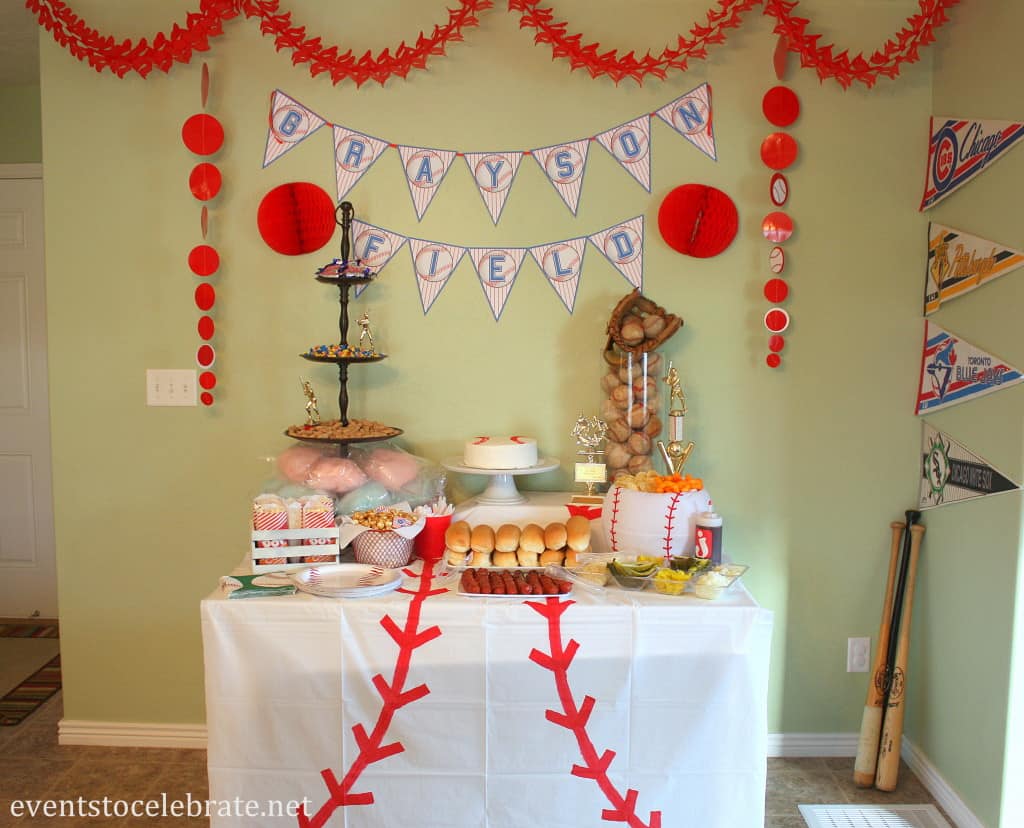
My baby boy just turned one and to celebrate we had a Baseball Themed birthday party for him. Though I made this birthday cake for his 1st birthday party, you could use it for any age. The simple design makes it perfect for a birthday celebration, the Fourth of July, or a baseball team party. So, follow along with me as I show you this easy baseball cake tutorial!
What you need to make this baseball cake:
As you will see in the ingredients list, I chose to use a red velvet cake mix. I did this to stick with the red and white baseball theme. However, you could use any cake mix flavor you like! In fact, you could even do a homemade mix of your own if you have the ingredients and time. But for the sake of time, I went with the simple option: a store-bought cake mix.
Ingredients:
- Betty Crocker Red Velvet Cake Mix
- Eggs
- Melted butter
- Milk
- Betty Crocker Fluffy White Whipped Frosting (1-2 jars)
- Wilton Red Sparkle Gel
- HOT water
Kitchen Utensils:
- Round Plastic Lid (I used my Pampered Chef Batter Bowl lid)
- Off set spatula
- Serrated Bread Knife
- Cooking Spray
- 2 round cake pans
Step 1: Mix the Cake
Empty the box of cake mix into a mixing bowl but instead of adding what they suggest on the package, add 4 eggs, 1/3 cup melted butter and 1 cup milk. This will help your baseball cake taste homemade and will give the texture more density, which is helpful when stacking the two layers.
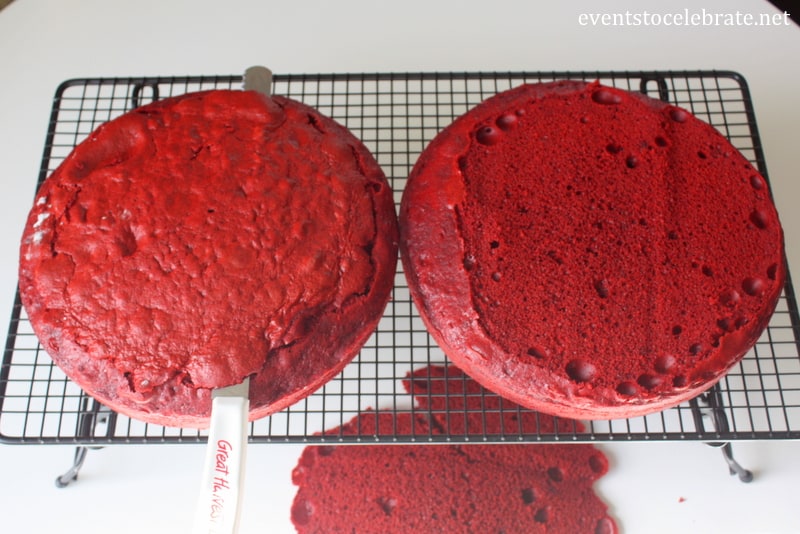
Step 2: Bake the Cakes
Pour the batter into two 8-inch greased and floured baking pans and bake according to package instructions. Allow to cool completely on a wire rack. This part is very important! Letting your cakes cool will help you get an even cut in the next step.
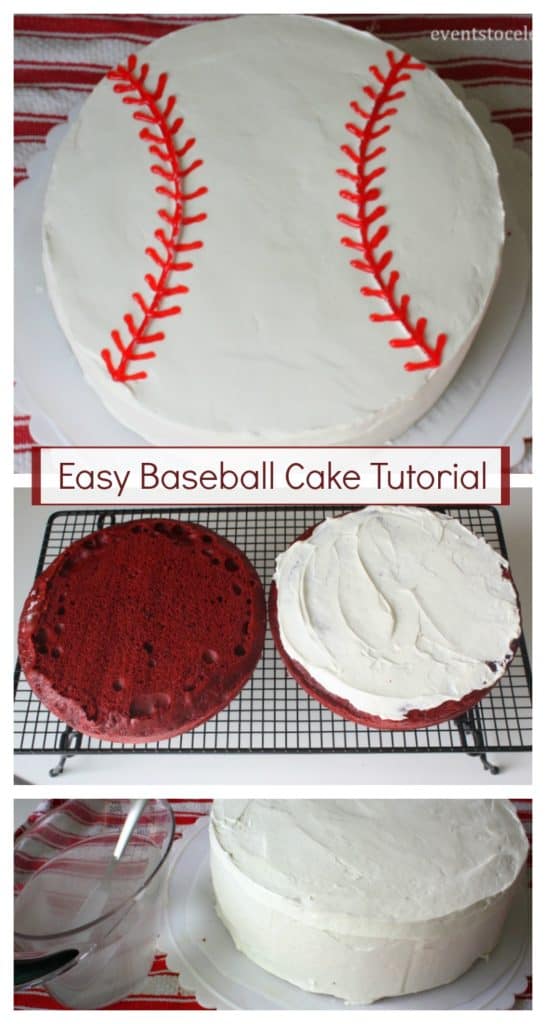
Step 3: Prepare for Stacking
Once your cakes have cooled, you will want to level them. Using a serrated bread knife, slice the rounded dome off each layer to create a nice flat surface on each cake. While this step may seem unnecessary, it will help your cakes stack flat on each other, make decorating easier, and help your finished cake look more professional!
Step 4: Stacking the Cakes

Before staking the cakes on top of each other, you want to spread a nice even layer of frosting on one of the cakes. Once you have done that, flip the other cake (cut side down) on top of the frosting. This step will help bind the two cakes together into one thick cake you can frost!
Step 5: The Crumb Coat
Because we are frosting a red cake with white frosting, adding a crumb coating is essential! Start by piping frosting all over the cake and using an offset spatula to spread it very thinly over the entire cake. I start at the center of the cake and work out and then cover the sides. You can see in the picture below how little bits of the red cake show through. This is why you want to add a second layer of frosting on top. But before the second layer of frosting, place your cake in the freezer for 15 – 30 minutes to allow the frosting to get firm.

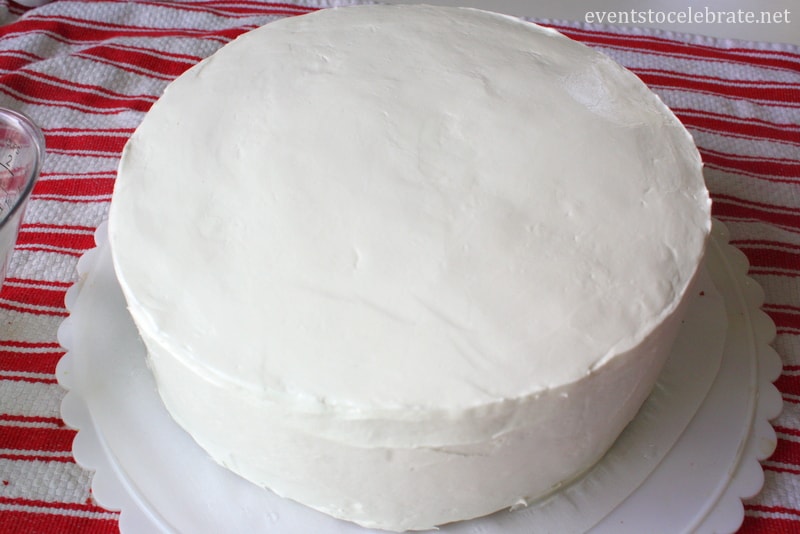
Step 6: Frosting the Baseball Cake
Add a generous amount of frosting on the cake (I used nearly an entire jar on this step). Starting from the center of the top, work your way out and around the sides making the frosting as smooth as possible. Nobody likes a cake with too little frosting!
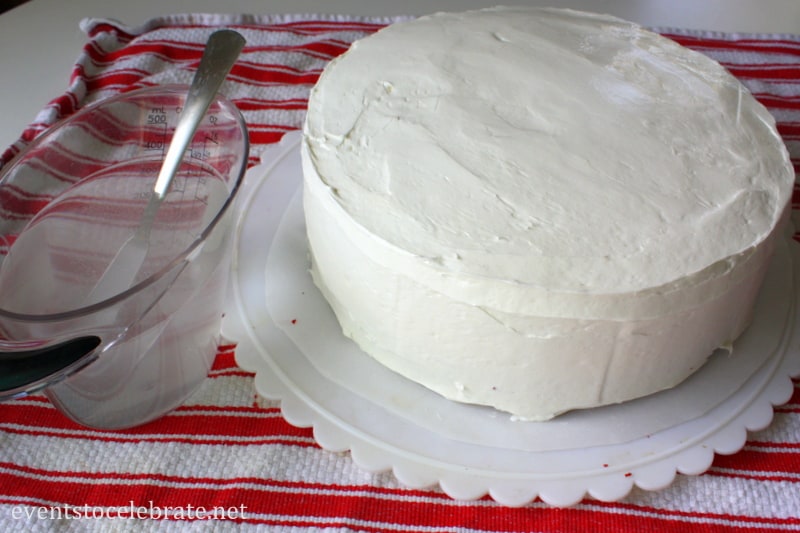
Step 7: Smoothing the Frosting
There is a really popular method for smoothing the frosting using a Viva paper towel, but I didn’t have any. I just got really hot water and put my offset spatula in it. I would put very little pressure on the frosting with it as I smoothed it across the surface. I dipped it in the water every few seconds. This kept the spatula hot and added just enough water to really get a smooth surface.
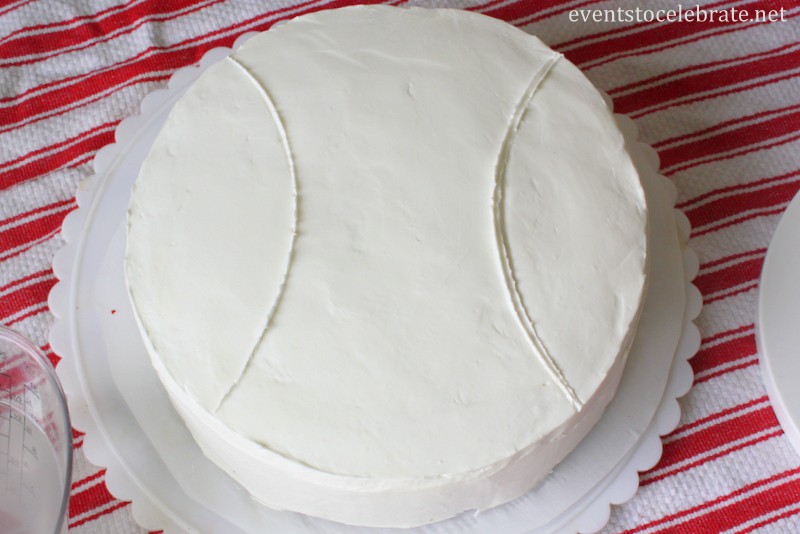
Step 8: Marking the Baseball Laces
In order to make the look of laces on a baseball, I used the lid of my Pampered Chef Batter Bowl. By gently pressing the outer rim of the bowl onto the top of my cake I got perfectly curved lines! But don’t worry if you don’t have the exact same bowl as me. You could use any large round bowl or lid to get this same effect. (Before moving on to the next step, I think it would be good to freeze the cake for a few minutes)
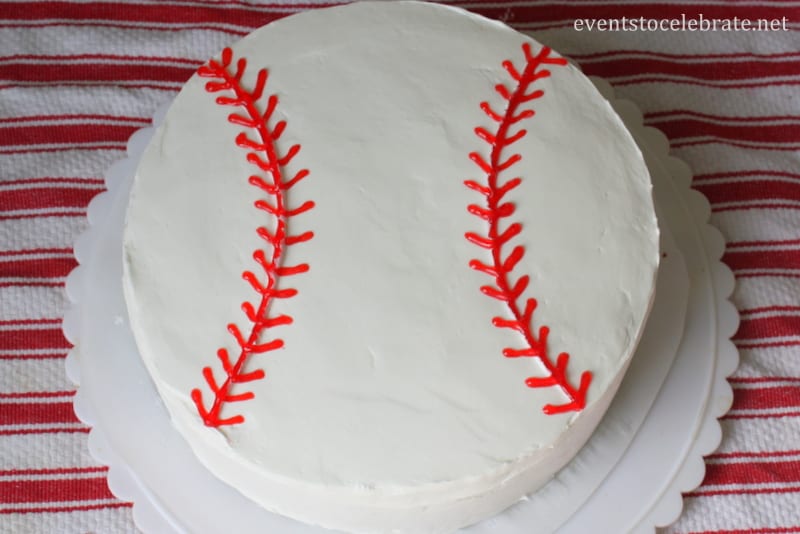
Step 9: Piping the Laces
Now on to the baseball stitching! I used the red sparkle food gel to add a solid line and then added the V laces. Just make sure to go slow. My baby was waking up from his nap just as I was doing this step, and well, some of them paid the price for it. 🙂 Another option for making the baseball laces is red pull-n-peel licorice. But I still think it turned out fabulous, especially considering my past attempts at birthday cakes. Please tell me I’m not the only one who has made an awful looking cake, haha!

Just like that, you have a picture-perfect baseball cake! But don’t go yet! I have more baseball party ideas for you.
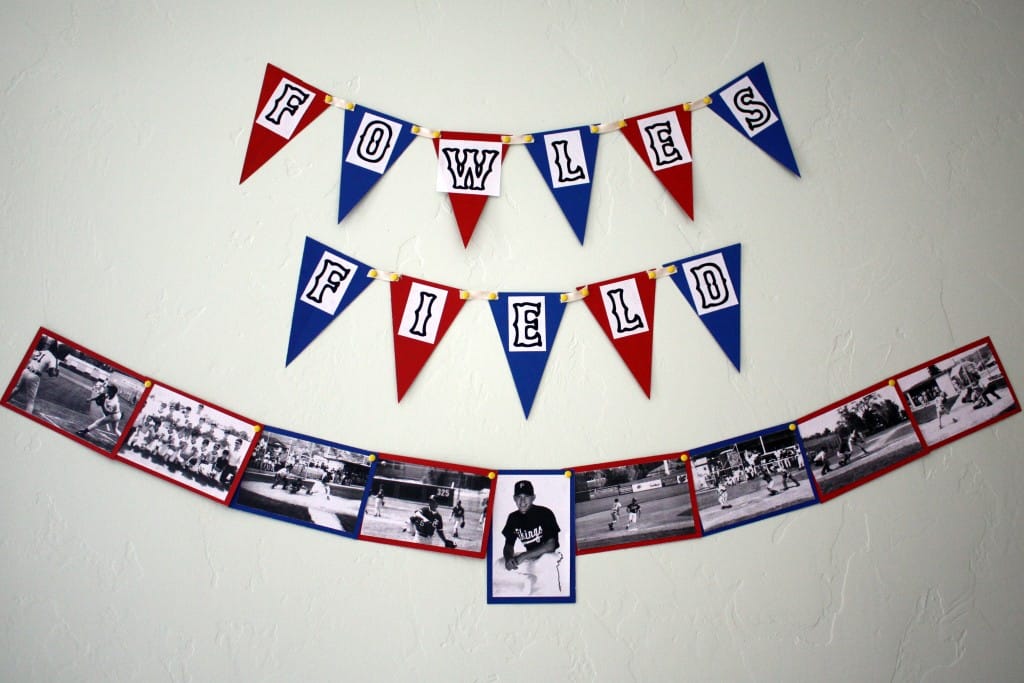
Of course, a baseball party isn’t complete without other decorations and food. Below I have attached 2 different baseball parties I have thrown. In these blog posts, I share about the decorations I made/purchased, the setup, and party food. Definitely check them out for more baseball party ideas!!
FOR MORE BASEBALL PARTY IDEAS:
WHY YOU SHOULD COME BACK TO MY PAGE
Here at Events to Celebrate, my whole goal is to help real people plan for their kids’ birthday parties, life events, and holidays! I am a mom and I GET IT. You don’t have endless time OR money to spend on parties, but you still want to help your guests have a great time. I’m here to help give you tips, tricks, and ideas for celebrating life on a budget.
As a mom, you want to do it all. You want to make your family happy and create special memories. My brand is all about creating special moments with those you love. The kind of moments that you will look back on years later and wish you could relive! So, if that’s something you’re interested in, stick around! I have an email list you can sign up for, so you don’t miss my future party ideas!
PIN FOR LATER
wondering how far in advance I could make this cake? can I freeze or refrigerate after the red piping? anyone try this?
Can I use regular vanilla cake instead of red velvet? Would I make the batter the same way as you suggested instead of by the box ?