
Halloween Mystery Box Game for Kids
This post may contain affiliate links, including Amazon Associate links. As an Amazon Associate, I earn from qualifying purchases at no additional cost to you. Please see my Disclosure Policy for more details.


Hello! And welcome to my site! In this post, I’ve included an inexpensive, fun Halloween activity for kids. Follow along to see what items I put in the bags, to get access to my free printable, and for more family-friendly Halloween content!
Note: You may have also heard of this activity as the ‘Halloween Mystery Bag Activity’ or ‘Touch and Feel Game’.

Some of my earliest memories from Halloween include attending a church Halloween party and sticking my hand into a Halloween Mystery Bag and feeling peeled grapes, cooked pasta, and pumpkin guts.
Because of that, I wanted to recreate the experience for my own kids to enjoy, but without the mess and gore of the ones from my childhood. Now, making these Halloween mystery bags is one of our favorite ways to celebrate the holiday!
Why this is a great Halloween activity for kids
Here are the top reasons you and your kids will LOVE this activity:
- Budget-friendly – You really don’t have to break the bank to help your kids and their friends have a fun time. The materials for this are super cheap and easy to get your hands on.
- Fun – This Halloween game is always a success! I’ve done it for a couple of years now, and the kids enjoy it every time.
- Works with any number of people – You can do this mystery bag activity with one kid or 10! That makes it great as an afterschool activity, party game, or as a little something for trick-or-treaters.
- Minimal setup/cleanup – Since really all you are doing is printing off the answer sheets and assembling the bags, it isn’t a huge time commitment to throw together. As a busy mom, that’s probably my favorite part!!
- Any age can play – Pretty much any age group can play this game. My recommendation is to do it with kids who are elementary-age or higher. That way they can more fully participate by describing what they feel and writing down their guesses on the answer sheet.
Additional Halloween Fun
- Fun Halloween Danger Word Game
- Easy Trunk or Treat Ideas
- Cute and Not-so-Spooky Halloween Letter Board Ideas
- Make Your Own Fun Halloween “You’ve Been Boo’d” Gifts
- Trick or Treat Halloween Banner
- Simple and Fun Halloween Crafts For Kids
Halloween Mystery Box/Bag FAQs
How long does it take to set up this activity?
- Less than 30 minutes! A lot of these items you will likely have lying around your house, but a few of them you may need to pick up from the store. This will make your assembly process just a little longer, so keep that in mind. However, once you have all the materials, it takes about 15 minutes to add the items to each bag, label the bag with a number, and print out the answer sheets.
Can I switch out what items I put in the mystery bags?
- Of course! Because I have younger kids, I opted for the less messy options. However, there are all kinds of things you could add to your mystery box. Continue to the next section for more ideas!
How long does the game take?
- It’s about 15 minutes for 1 person and you can add an additional minute or 2 for each additional person. (This includes the time explaining the activity and then actually doing it). The more people that play, the longer it will take, but not by too much.
What to put into a Halloween Touch and Feel Game
For a touch-and-feel game, you want to have 8-12 different items for your players to feel. This is enough for the game to be fun, but not so many that it’s overwhelming.
When coming up with items for this game, I thought about popular Halloween characters and various body parts or items they might have. This can be a helpful strategy if you choose to come up with your own mystery bag items.
You’ll notice that with my version, I kept the items pretty tame. I opted for less scary and less messy mystery items. Teens really like the more scary stuff, but since I have young kids I was more than happy to forego that. But, if you want to either add to your game or amp up the fear factor, read below.
Materials needed for a Halloween Mystery Box Activity
The nice thing about this activity is that the materials are very flexible. You can make all kinds of substitutions and swaps based on what you have readily available!
Materials you’ll need for this activity:
- Either a box or brown bags for the number of items you plan on having as part of the Halloween Mystery Box Activity.
- Mystery box items – Whichever ones you choose (See my list in the next section)
- Answer sheets – Use my free printable! It can be found near the bottom of the page.
- Writing Utensils – Pens, pencils, markers. You name it! Players will just need something to mark their answers with. This will also be used to add a number to each of the bags.
Mystery Box Items
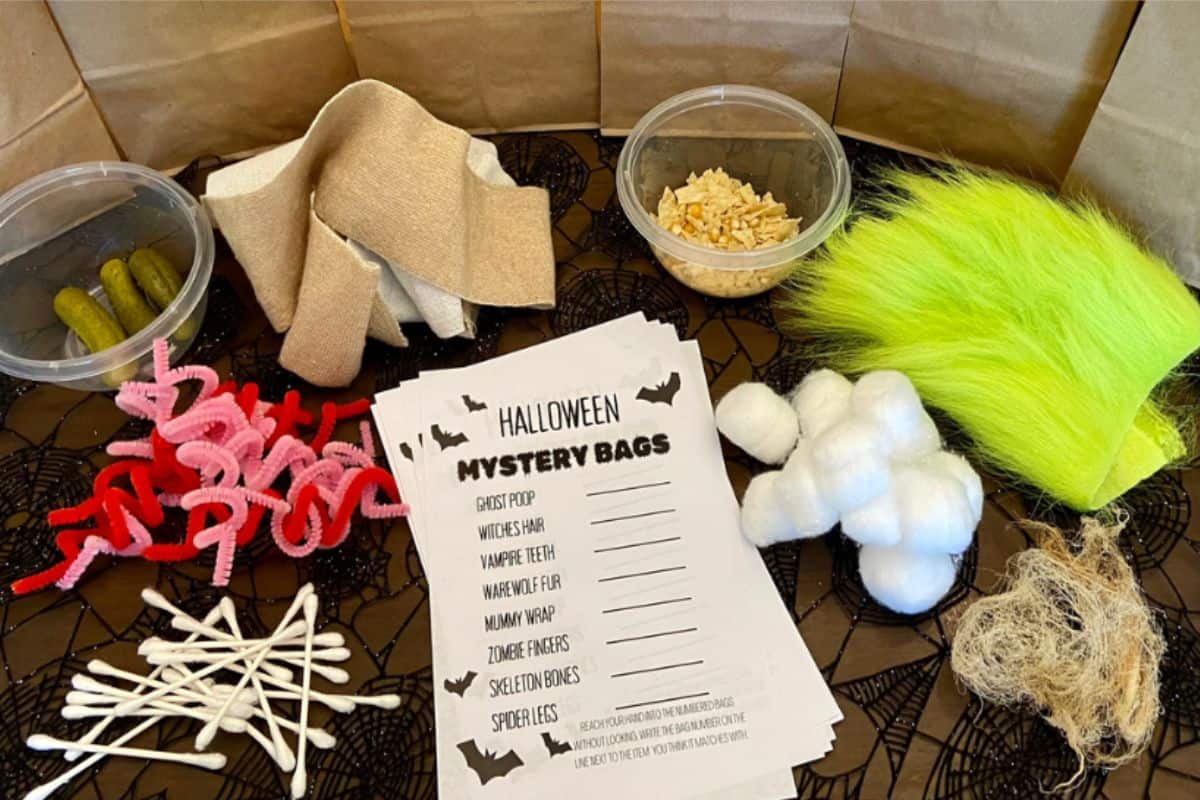
Here are the items I included in my Halloween mystery bag activity.
- Ghost Poop: Cotton Balls
- Witches Hair: Corn Silk
- Vampire Teeth: Crunched up Tortilla Chips & Popcorn Kernels
- Werewolf Fur: Craft Store Fur – remember this Halloween door I created? But you could also use an extra fluffy stuffed animal.
- Mummy Wrap: Ace Bandage
- Zombie Fingers: Baby Dill Pickles
- Skeleton Bones: Cotton Swabs
- Spider Legs: Pipe Cleaners or Chenille Stems
Other Mystery Bag Items:
This list tends to be a little bit more messy and scary. It is great for adventurous kids and teens.
- Zombie hair: Cooked noodles
- Witches Eyes: Peeled grapes
- Bat Wings: Beef Jerky
- Cat’s Tongue: A slice of strawberry or piece of Starburst Airs candy
- Frankenstein’s snot: A tissue with Jelly
- Jack-O-Lantern Flesh: Pumpkin seeds and guts
- Clown Hair: Cotton Candy
- Scarecrow Brains: Pieces of straw or uncooked noodles
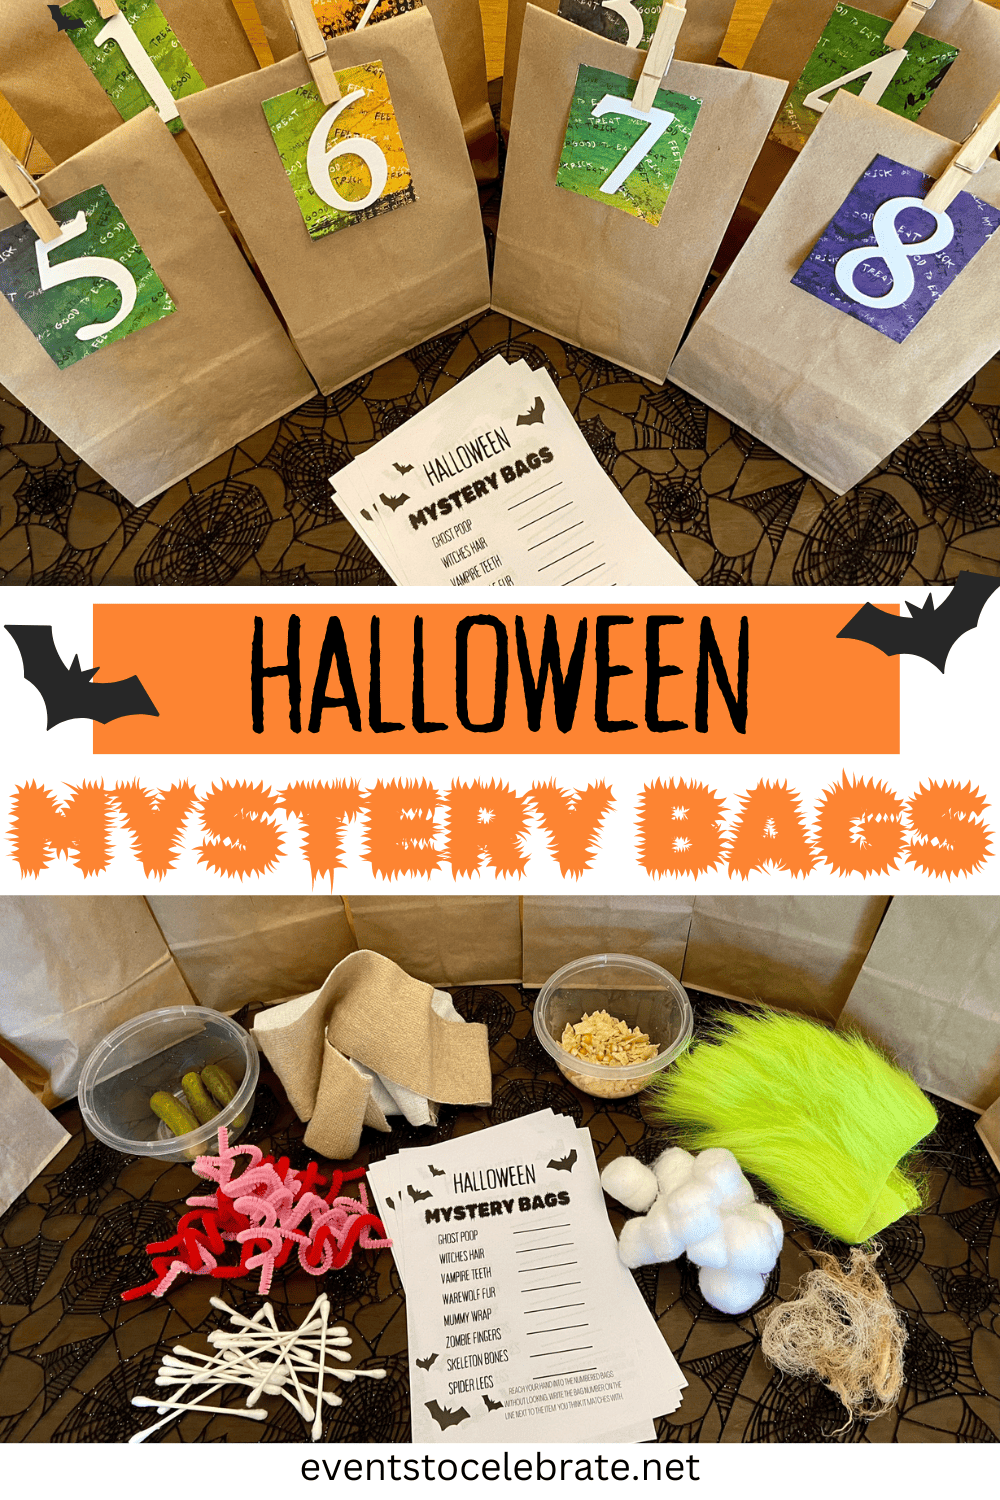
How to make your Halloween Mystery Bags
- Before starting your assembly, you want to gather all the needed materials.
- Next, open up each of your brown bags or boxes so that they are standing and ready to place a mystery item inside.
- Then, place your mystery items in the bags. Each item should have its own bag.
- Mark each bag with a number
- If you haven’t already, print off your answer sheets and cut them in half.
- Make an answer key by filling out one answer sheet with the correct answers to the Halloween game.
- Once that is finished, put the filled mystery bags/boxes out along with the answer sheets and writing utensils. Your spooky activity is now ready to play!!
How to Play: Halloween Mystery Box
The instructions are simple.
Hand out an answer sheet and writing utensil to each person who is going to participate in the activity. Then, have each person place their hand inside the bag without looking. Once all the players have felt the mystery item in that bag, give them a second to think and write down the number of the bag next to which item they think they just felt.
After players have written their answers, you can move on to the next box/bag. Continue this until everyone has gone through all of the bags.
Next, show the kids or friends the answer sheet and have them tally up how many they got correct. Though a prize isn’t necessary, it can make this Halloween game even more exciting for participants.
I usually like to give them a small piece of candy for each one they get correct. That way everyone benefits from playing the game!
Free Halloween Printable
To make the game set up even easier, I’ve created a FREE PRINTABLE Halloween Mystery Bag document. These print in black and white and 2 per page which means you don’t need a fancy printer. And if you DO want to get fancy, you could print them onto orange paper which would make them really cute!
This Halloween printable includes all of the items I listed above for the Mystery bag activity.
Here is the free printable tally sheet:

These keep it very kid friendly because they skip out on the gore of brains, hearts, guts and mess! Your little ones are going to love it!
And if you have other mess-free ideas for items to include in the mystery bags, share those ideas in the comments! Also, make sure to sign up for my email if you want more family-friendly content. I have everything from recipes to decor to party ideas!
Do you already have a printable made for the messier/grossier items? Or do I have to make my own?
Sorry, I didn’t make a printable for the messier ones, but I did want to offer suggestions for readers who wanted to do a messier, more dramatic version.