
Easy Halloween Door Decorations
This post may contain affiliate links, including Amazon Associate links. As an Amazon Associate, I earn from qualifying purchases at no additional cost to you. Please see my Disclosure Policy for more details.
Easy Halloween door decorations are my absolute favorite way to kick off the spookiest month of the year. These festive halloween door ideas are fun and easy. What more can you ask for?!
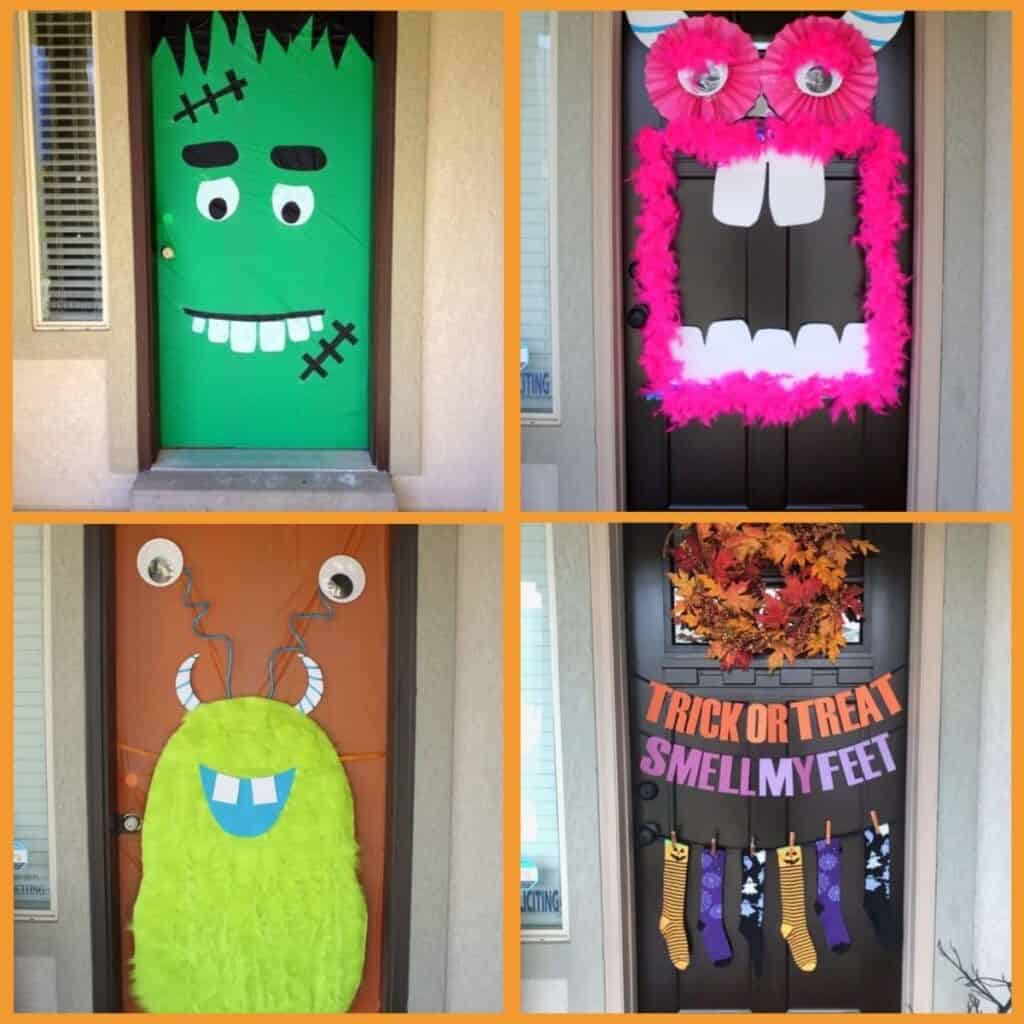
I don’t know about you, but I love normal-people holiday decorating! Some people go all out to try to achieve Pinterest perfection, but honestly, my goal is to have fun creating memories with my family. I just want to do some fun decorating with affordable materials.
We’re talking dollar store materials and a few craft store items. No expensive props, no professional decorating skills required, just an hour or two of your time and some creativity.
Whether you want something silly (hello, Helga the monster), something classic (Frankie makes an appearance), or a super fun door banner, there’s a design here for you.
Let’s get your door ready for the best night of the year!
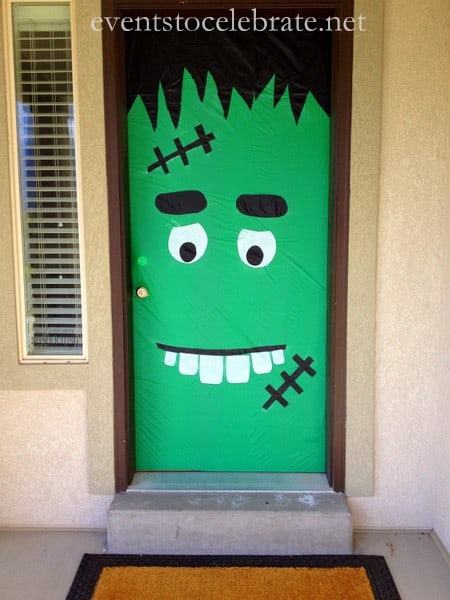
Super Easy Frankenstein Halloween Door Decoration
This one is about as simple as it gets, and it’s a great starting point if this is your first DIY door decoration.
What you’ll need:
- Green plastic table cover (Dollar Store)
- Black plastic table cover, for cutting the features
- Scissors
- Spray adhesive
- Painter’s tape
How to make it:
- Measure your door and cut the green table cloth about 2″ wider and longer so it wraps around the sides once finished
- Cut and adhere the black hair and facial pieces to the green table cloth while it’s laid flat on the floor. I found out that it’s much easier to create Frankie while laid flat, rather than working on the door itself. Also I didn’t want to risk getting spray adhesive all over my door and door frame
- Cut and adhere the white facial features to Frankie’s face
- Secure the finished piece to the door with painter’s tape
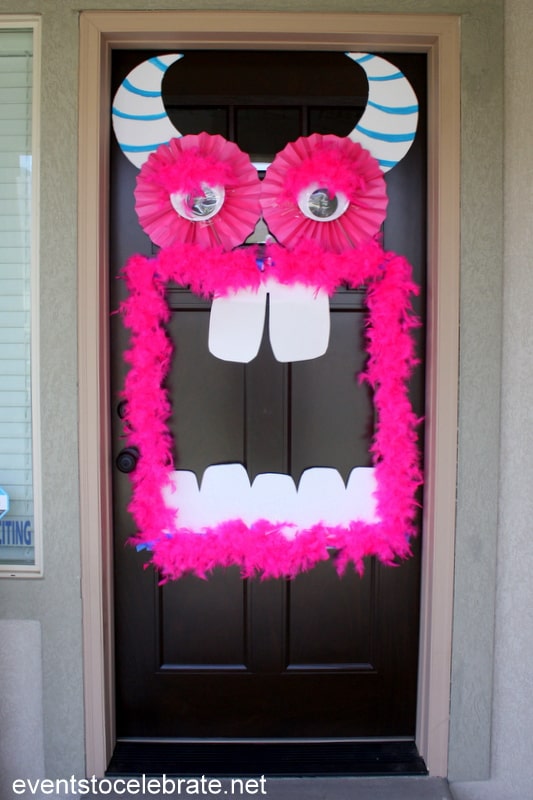
Helga The Monster Door
A feathery, silly (not scary!) monster door. Full disclosure, I created this door with the previous Halloween’s Trunk or Treat decorations. I liked the hot pink, but you can make Helga any color you want!
What you’ll need:
- Giant wiggle eyes
- Paper party fans
- 2 Feather boas
- White poster board
- Foam board
- Painter’s tape
- Blue marker or craft paint
How to make it:
- Consider using a black plastic tablecloth as a backdrop for Helga
- Cut horns out of the foam board or poster board, add stripes with marker or craft paint
- Cut silly teeth from the white poster board
- Use the feather boas to create the monster’s mouth
- Attach everything with painter’s tape. It won’t leave residue or pull paint off your door the way other tape can
- Add giant googly eyes to the the opened paper party fans, and then attach those to the black backdrop or the door (using painter’s tape)
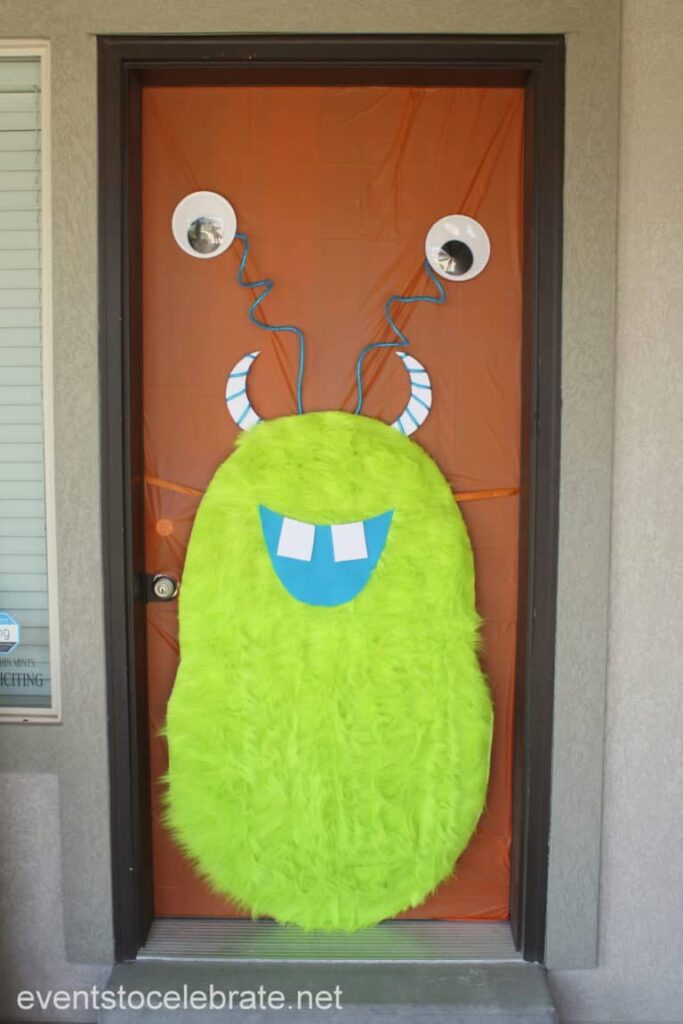
The Furry Monster Halloween Door
How adorable is this little green monster!?
Materials for your Door Decoration Monster
- 3 pieces of Foam Board
- 1 large piece of Furry Fabric that will cover the size monster you want
- Duct Tape
- Scissors
- 1 Large item to trace (I used a Hula Hoop)
- 2 Giant Googly Eyes
- Blue felt
- 3M Spray Adhesive
- 1 Plastic Table Cover
- 2-5 Wooden Paint sticks
- 1 6-7 ft long piece of String/Ribbon
- Glue Dots
- Blue Mesh Tubing
How to Make this Halloween Door Decoration
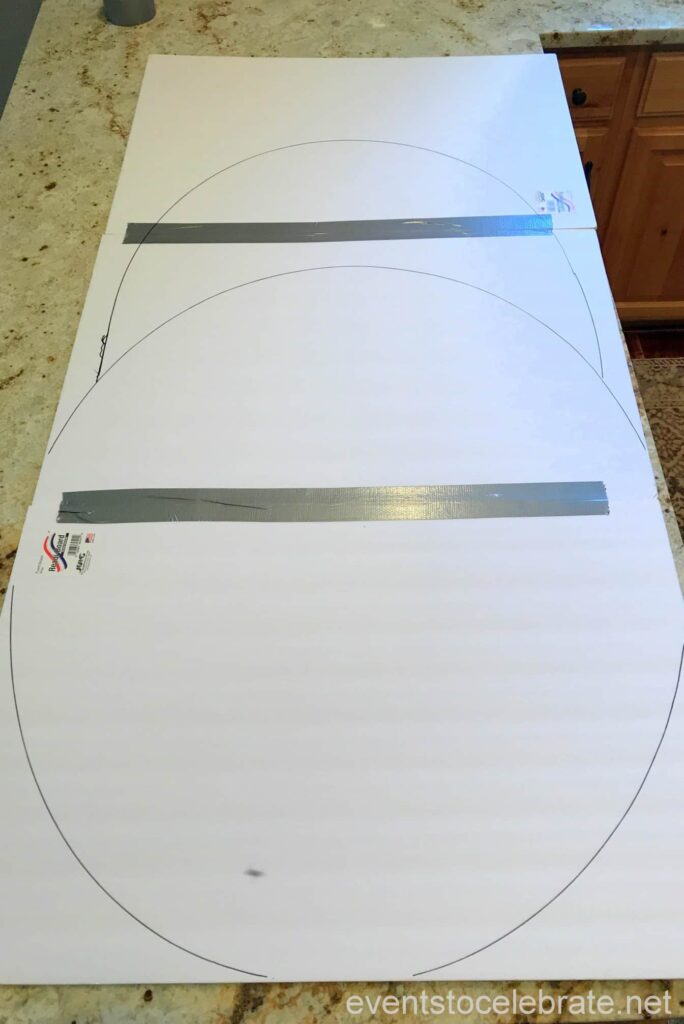
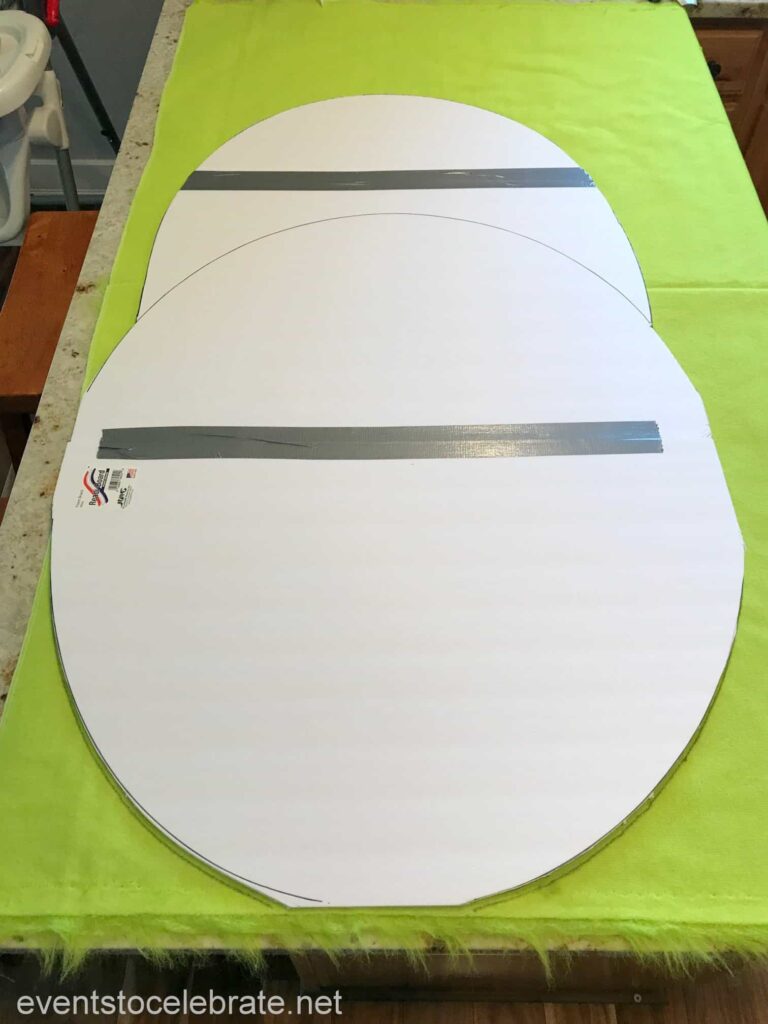
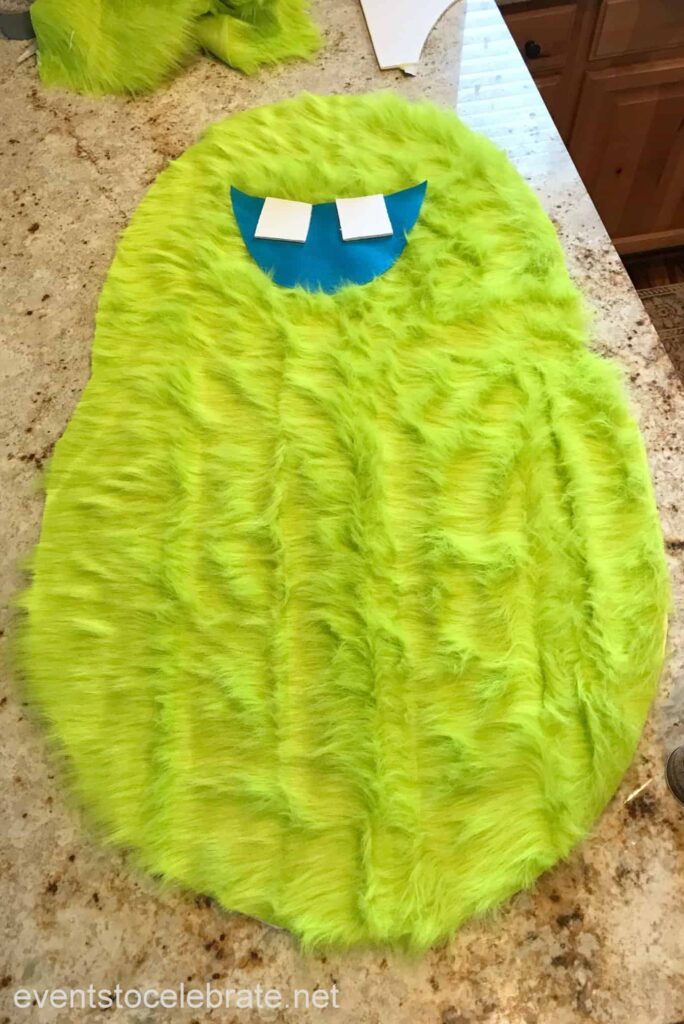
- Grab your crafting materials!
- Lay out the 3 pieces of foam board and duct tape them together – You want each piece of foam board close to the other so that when it’s taped, it will look like one giant board.
- Draw the Monster’s shape on the foam board – In order to do this, I used a hula hoop that I was able to bend in order to draw the body shape I wanted.
- Cut out the Monster’s body – Once finished tracing the monster’s body, cut it out.
- Cut out fur for the body – Then, place the body outline on the backside of your fabric. Trace the shape of your monster body and cut along the traced line.
- Make the items for the Monster’s face – To create the mouth I used blue felt and the teeth are cut from additional foam board.
- Use Spray Adhesive to adhere all of the pieces together – Definitely do this step outside. I used 3M Spray Adhesive, and that can be very sticky.
- Cover your door with any color of plastic table cover/paper – While the Monster body dries (from the sticky adhesive) use something to cover your door. This will help protect it from any of the sticky materials. Use painter’s tape to attach the plastic table cover.
- Stick your Halloween Monster decoration to the door – Once your door cover has been secured, I stapled some ribbon to the back of the foam board and then tied it around the door (over the middle hinge) to make it as secure as possible. You can add extra tape as well to attach it to the door cover.
- Add your horns and eyes – Use glue dots to add the horns. They can be made by wrapping the foam board in blue mesh tubing. For the eyes, use the same mesh tubing and some giant googly eyes to complete the monster’s face. Secure them with some glue dots and you’re done!
Creepy Plaster Fingers
These plaster fingers are a little more spooky than some of the other door decorations so definitely use your own discretion regarding how your little ones might react. Personally, I love them!
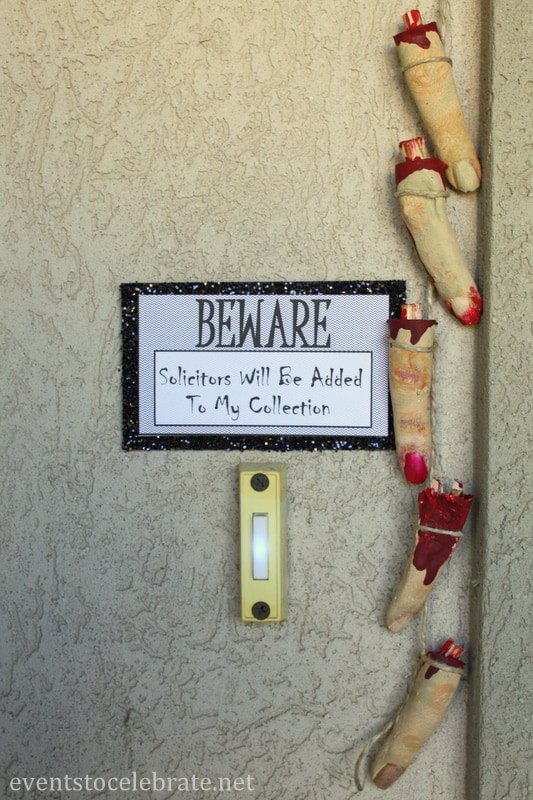
Materials Needed
- Plaster Casting Kit
- Twigs
- Twine
- Red, reddish-brown, nude and green craft paint
- Foam brush or 1″ paint brush
How to Make Creepy Fingers Door Decorations
- I bought this Plaster Casting Kit and followed the instuctions.
 I mixed the molding powder and then pushed my fingers into the cup. I had to hold it for about a minute until I could wiggle my fingers out.
 I mixed the molding powder and then pushed my fingers into the cup. I had to hold it for about a minute until I could wiggle my fingers out.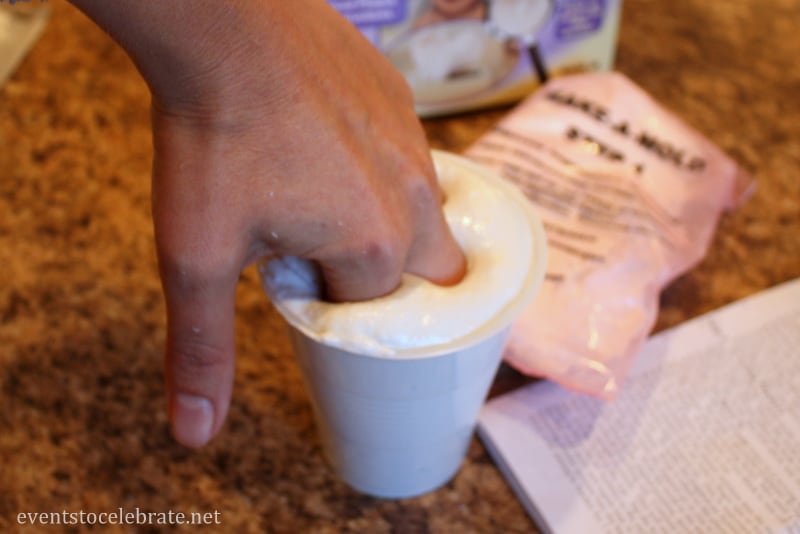
2. Mix the plaster that comes with the kit. Spoon a small amount into each finger mold and then tap the cup firmly on the counter to get the air bubbles out. Continue filling until you get almost to the top of the mold.
3. Insert some small twigs into the top of each finger to resemble the bones.
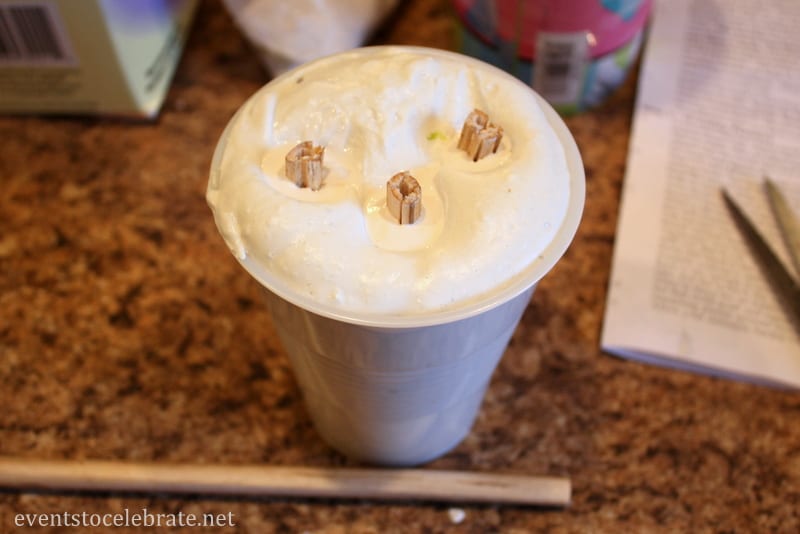
4. After drying for about 3 hours (or whatever the directions to your kit say), peel away the mold and let the fingers dry overnight. Not gonna lie, It was super creepy to come to my kitchen sink and see my fingers laying there each time I needed to use my sink!
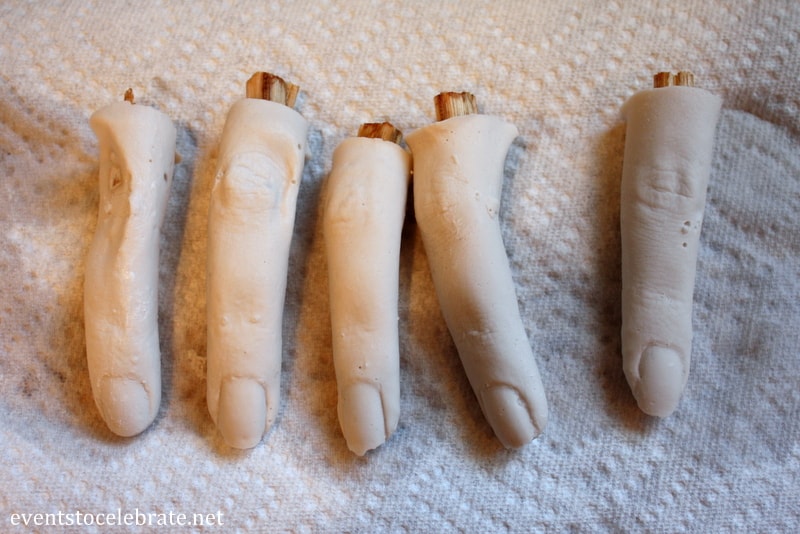
5. Use craft paint to paint different layers. I started with a nude/skin color and then accented with pale green, a darker tan, bright red and a really brown red.
6. Once you get them the way you want, tie them together with a length of jute twine, and hang them up.
“Trick or Treat, Smell My Feet” Door
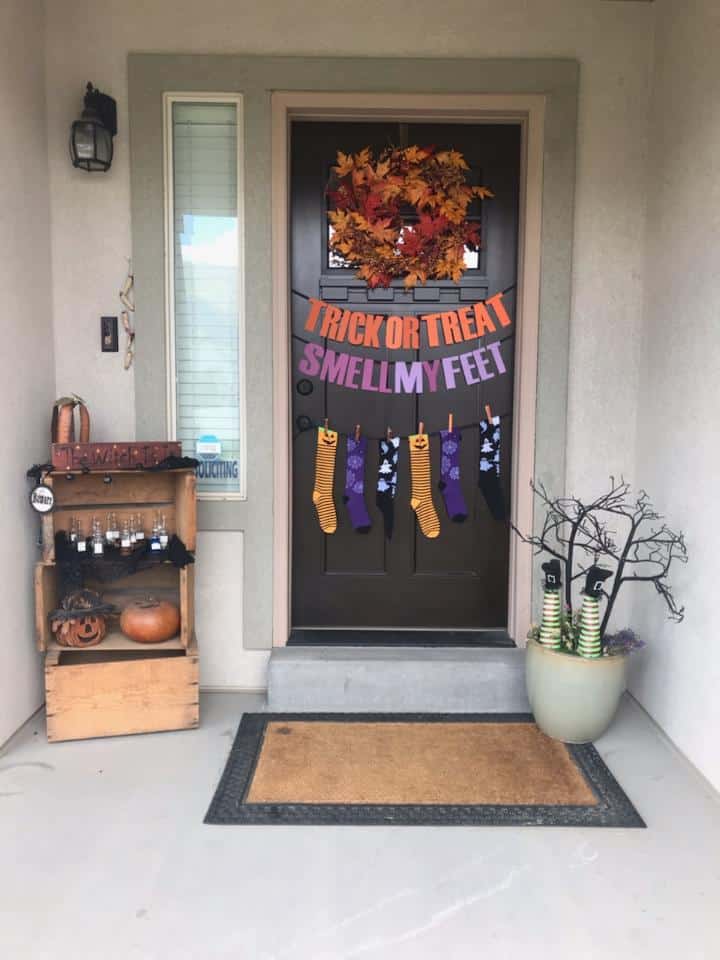
A fun Halloween design that’s especially great if you have a cutting machine. You can buy letters though if you don’t have a Cricut.
What you’ll need:
- A Cricut (or similar cutting machine) for the lettering or ready-made letters
- Halloween-themed socks (Dollar Tree has great ones)
- Clothes pins
- twine or ribbon
How to make it:
- Cut your “Trick or Treat, Smell My Feet” lettering using your cutting machine or purchase letters
- Arrange your letters on twine or ribbon: “Trick or Treat” on one ribbon and “Smell My Feet” on the lower one
- Arrange the Dollar Tree socks on a separate third tier for a fun visual effect
- A fun bonus: add a “potion bottle” prop nearby — it’s always a hit with neighborhood kids checking out the porch
Glittered Spider Web Halloween Door
Halloween decorating is all about creativity, and this glittery spider web door proves that you don’t need to spend hours or buy pricey supplies to create something eye-catching. With just a few simple materials, you can transform your front door into a spooky, sparkling centerpiece that everyone will notice.
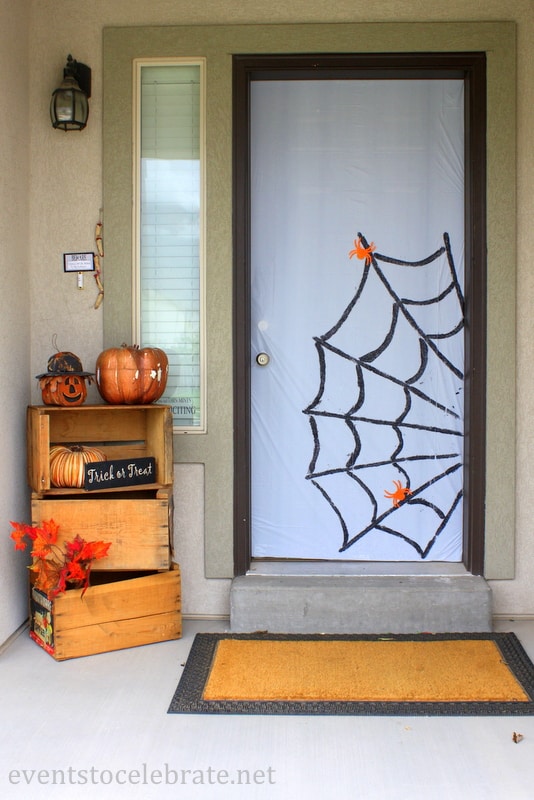
Supplies needed:
- White plastic table cover
- Mod Podge
- 1/2″ paint brush
- Black glitter
- Spiders (a Cricut-cut design or store-bought plastic spiders both work)
How to make it:
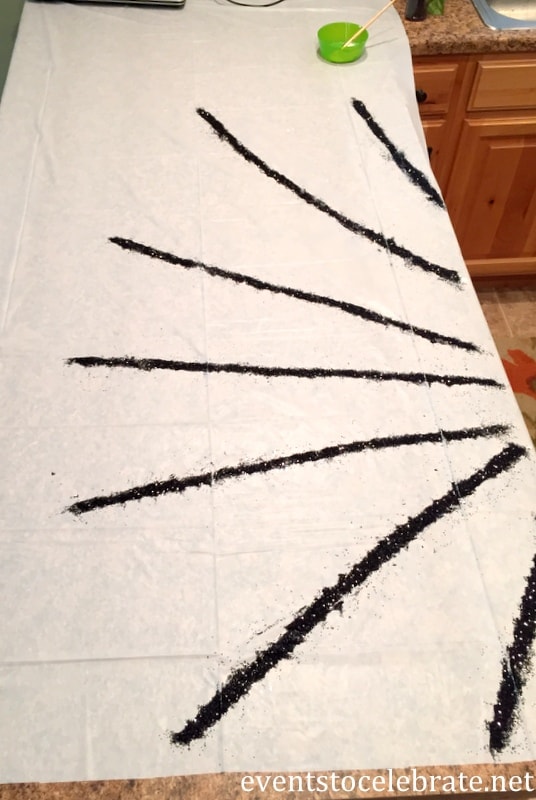
- Start with an inexpensive white plastic table cover (Walmart or Dollar Store). Measure your door and cut the cover about 2 inches larger on each side so you can tape it around the edges and fully cover the door
- Lay it flat (a kitchen island works well) and use a 1/2″ paintbrush to paint the web design with Mod Podge, working in sections so it doesn’t dry before you add glitter
- Paint the horizontal webs first, pour on glitter, let dry about 5 minutes, then shake off the excess before painting the vertical strands and adding more glitter
- Once fully glittered and dry (about 15 minutes), mix about 2 tablespoons of Mod Podge with 1/4 cup water and use a foam brush to seal the whole thing — this keeps the glitter from shedding every time the door opens and closes
More Halloween Decorating Ideas
Want to decorate your whole porch, not just the door? Check out my Halloween Porch Decorations post for a full front-porch transformation.
- How to Make Easy Glitter Pumpkins for Fall
- The Best Pumpkin Crafts for Your Home Decor
- Easy and Fun Halloween Porch and Window Decorations
- Free “Trick or Treat” Halloween Banner
- DIY Disney Halloween Decorations
Halloween Games and Crafts
- Halloween “You’ve Been Boo-ed” Baskets
- Simple and Fun Halloween Crafts for Kids
- Halloween Mystery Box Game For Kids
- Fun Halloween Danger Word Game
- Halloween Games for a Classroom Party
Money & Time-Saving Door Decorating Tips
- Stick with painter’s tape when attaching anything directly to your door. Other tapes can leave sticky residue behind or even pull paint off. You don’t want your holiday decor turning into an unplanned touch-up project.
- Always use spray adhesive outside or in a well-ventilated space.
- Shop the Dollar Store or Dollar Tree first. Nearly every design in this roundup starts with a cheap plastic table dollar store cover. Check there before spending more on specialty craft supplies.
- Watch for coupons at craft stores. A 40%-off coupon at a craft store brought the furry monster’s fabric down to just $13 for the whole piece.
- Assemble your piece flat on the floor or a table before it goes on the door. It keeps adhesive off your actual door and door frame.
- Snap a few photos once your design is finished and hung. Future you will be grateful next year when you want to recreate (or improve on) the same look without trying to remember your own steps from scratch.
Final Thoughts
However you decide to dress up your door this year, the best part about all six of these designs is that they prove you don’t need a big budget or serious crafting skills to make your house ready for spooky season. Whether you go classic with Frankie, silly with Helga, spooky with the creepy plaster fingers, funny with the sock display, or sparkly with the glittered spider web, your door will be ready to greet trick-or-treaters in style.
Happy haunting!
2 Comments