
Reusable Birthday Board

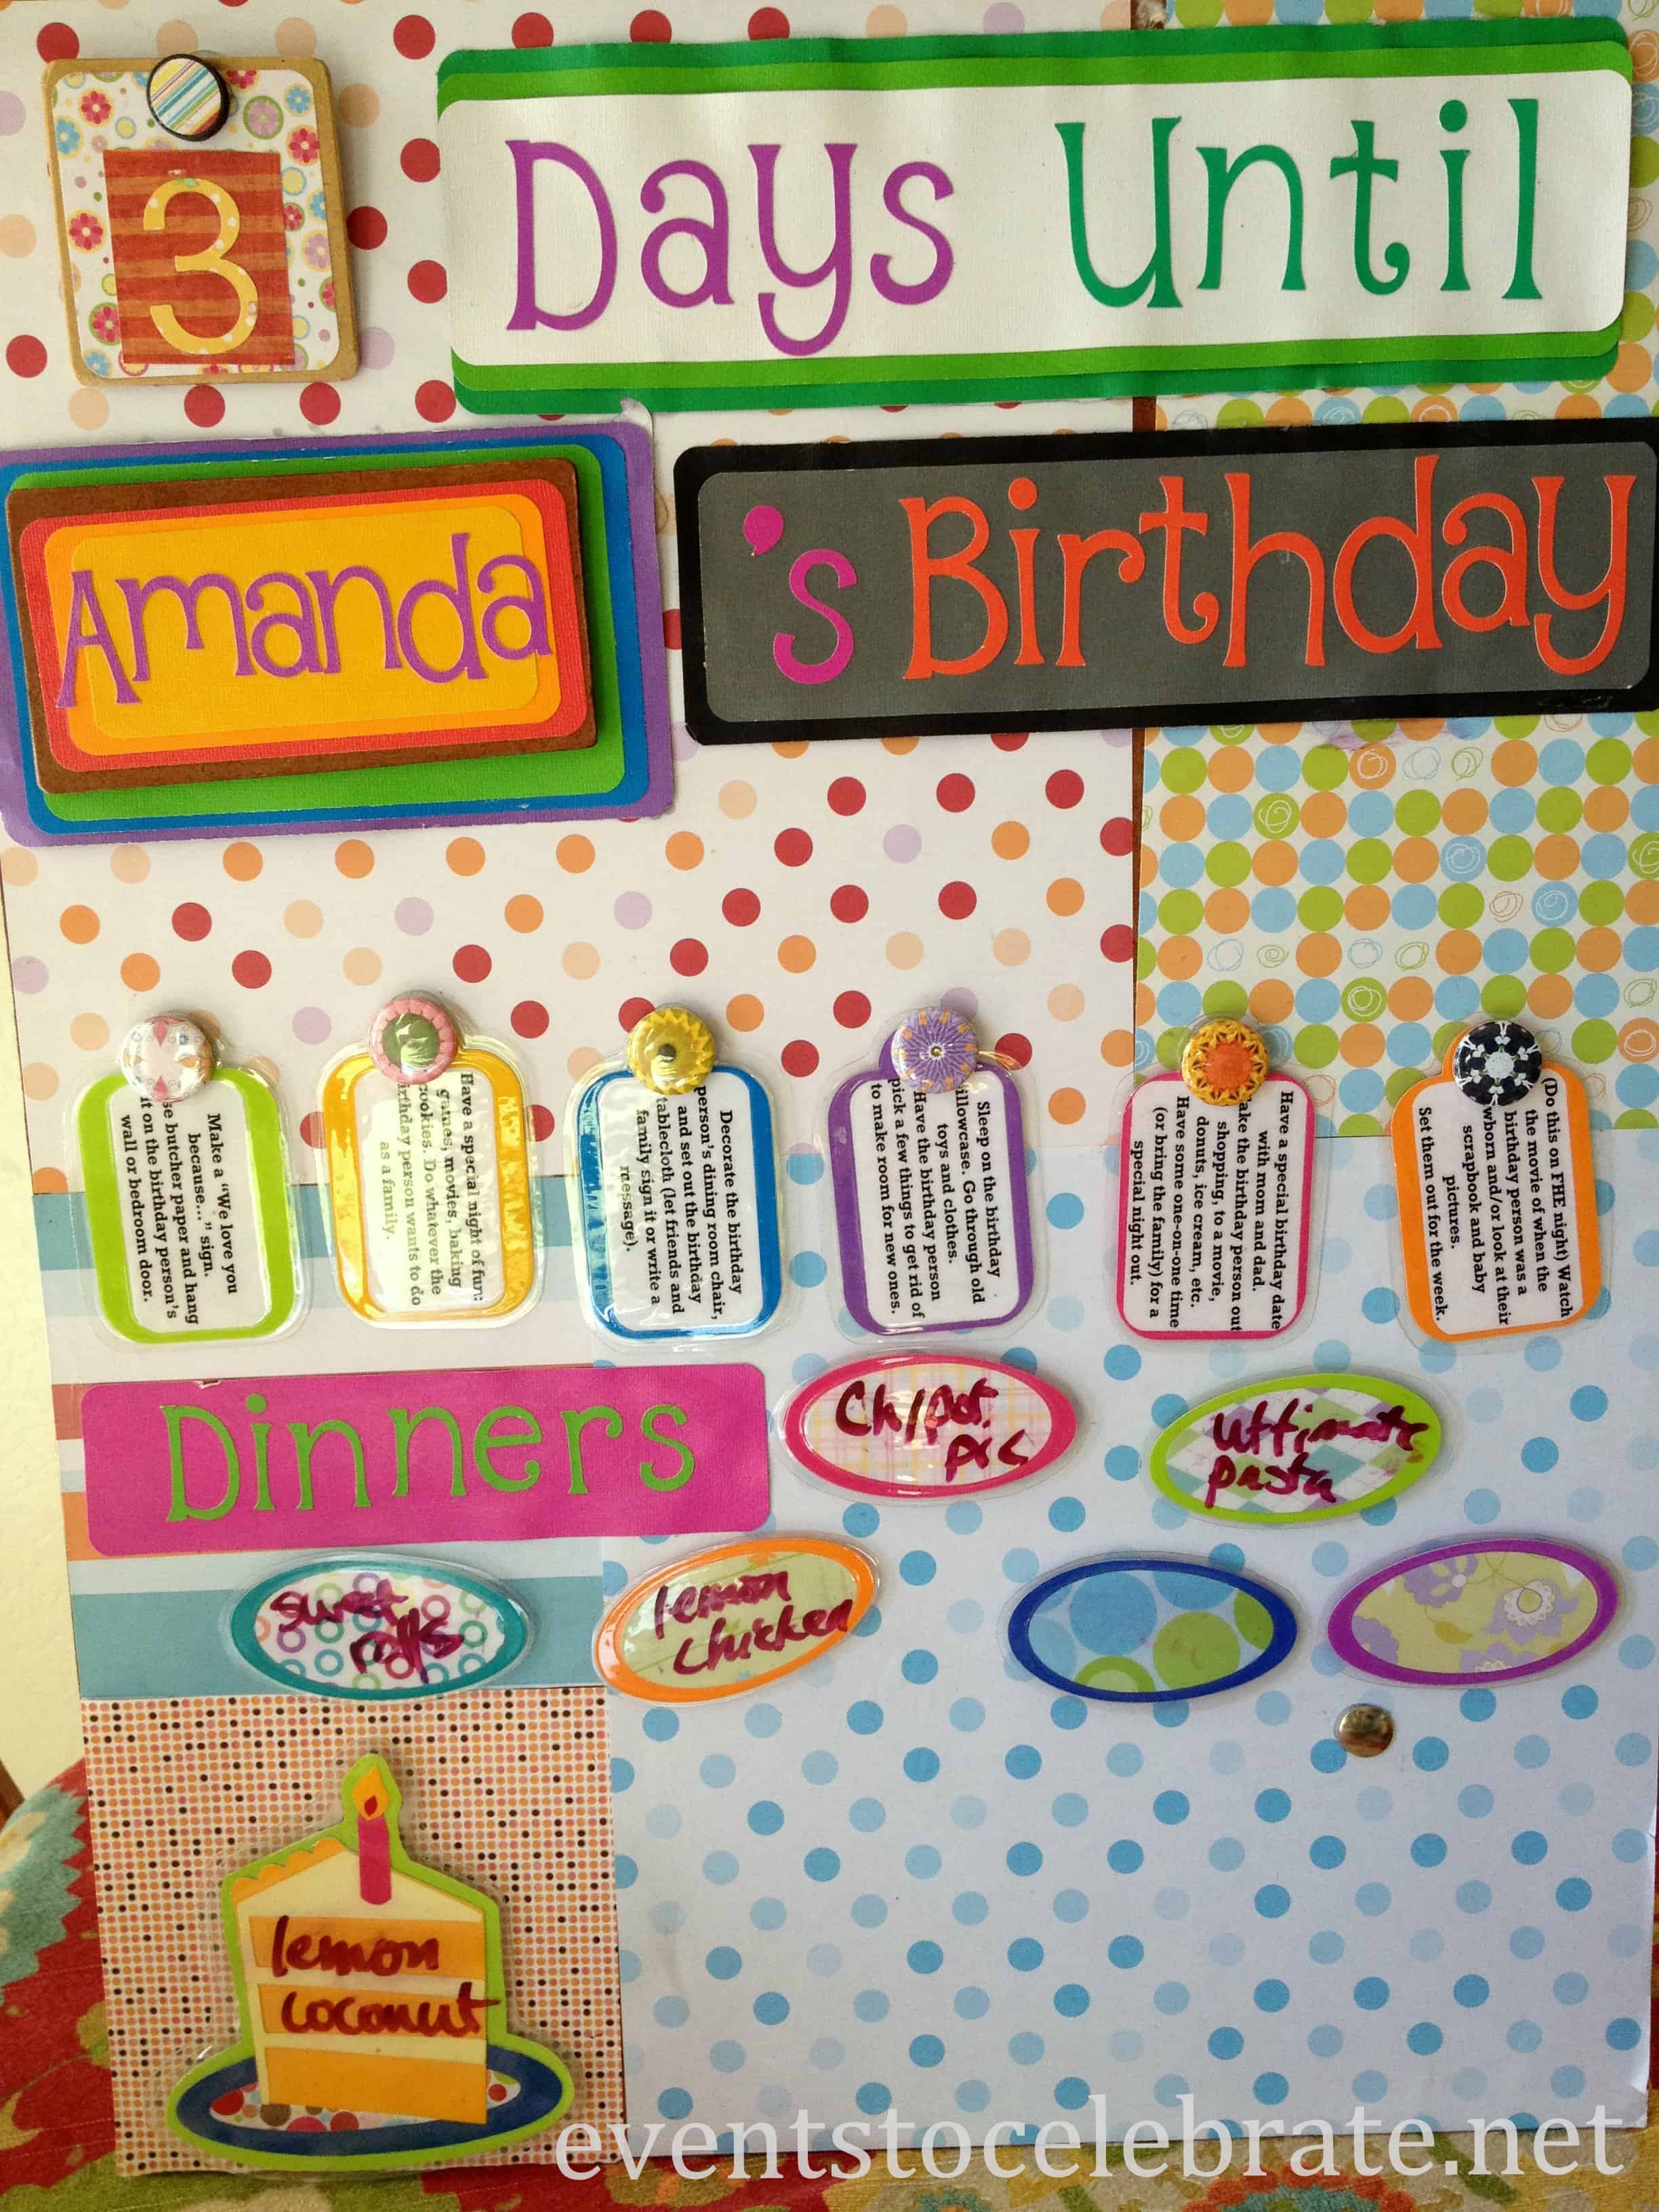
My sister is mighty crafty! She made this adorable birthday board for her children and I want to share it with you because it is a brilliant idea. She has had it for a few years (thus, the signs of a little wear), and that is one thing I love – it is reusable!!
For the base, she took a 2’x3′ foam board and covered it with scrapbooking paper and then added a layer of modge podge to help it have a bit of durability.
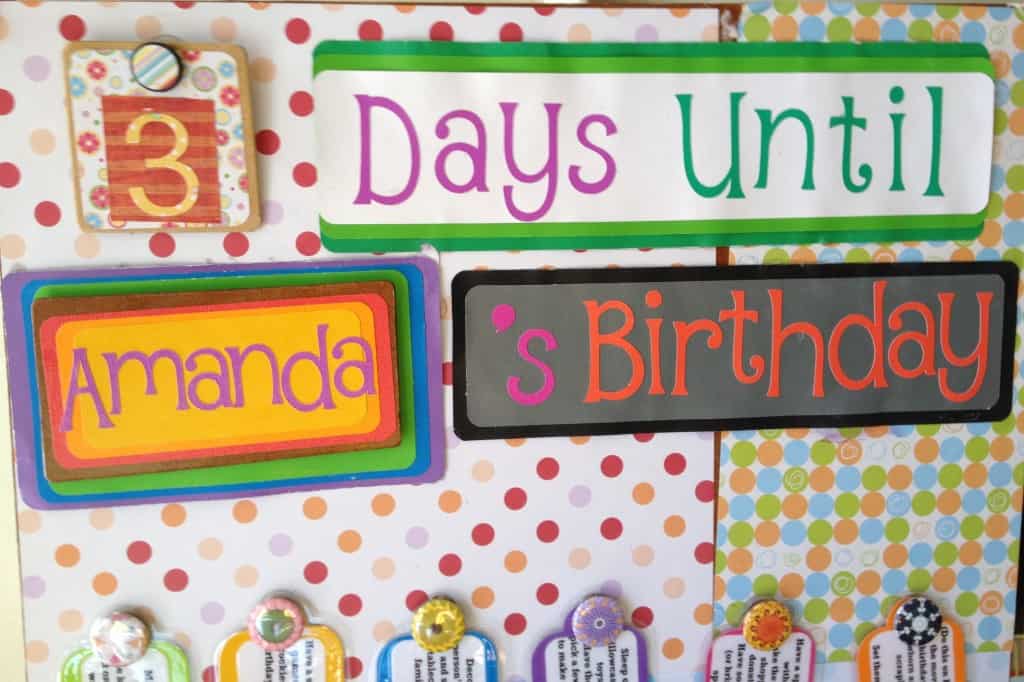
Count Down Tags: With numbers 1-7 on square coasters you can count down to the big day. The “Days Until” portion stays there and you just switch out the numbers (they have Velcro on the back).
Name Tag: A laminated name tag is made for each child and can be switched out because each one has Velcro on the back. The “‘s Birthday” stays there at all times so it is glued down.
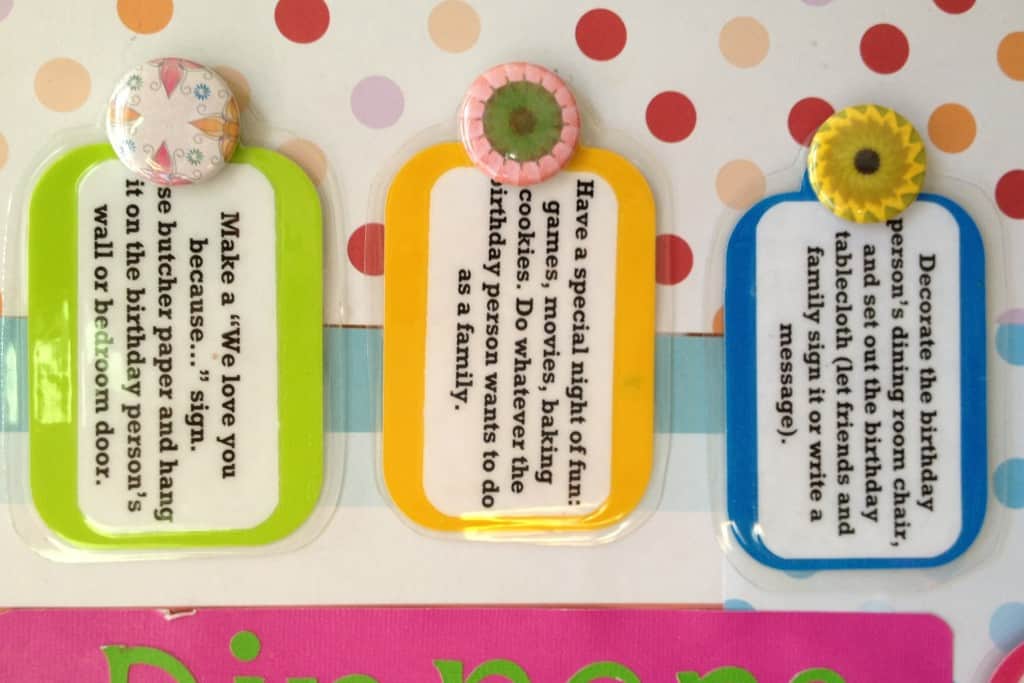
Next, there are six laminated tags that are held by cute handmade buttons that can be placed in whatever order will be best for your family schedule. They give something special to do the six days leading up to the birthday:
Tag 1 says: Make a “We love you because…” sign. USe butcher paper and hang it on the birthday persons wall or bedroom door.
Tag 2 says: Have a special night of fun: games, movies, baking cookies. Do whatever the birthday person wants to do as a family.
Tag 3 says: Decorate the birthday persons dining room chair, and set out the birthday table cloth. Let family sign it and write a message.
So, a little explanation about tag 3 – she made a chair cover out of felt that has a big “Happy Birthday” and candles sticking out the top. Each child also has a table cloth that is only brought out at birthdays that the family writes messages on in fabric marker each year.
Tag 4 says: Sleep on the birthday pillowcase. Go through old toys and clothes. Have the birthday person pick a few things to get rid of to make room for new ones.
A little more explaining. She made a special Happy Birthday pillowcase using fabric markers.
Tag 5 says: Have a special birthday date with mom and dad. Take the birthday person out shopping, to a movie, donuts, ice cream, etc. Have some one-on-one time (or bring the family) for a special night out.
Tag 6 says: Watch the movie of when the birthday person was a newborn and/or look at their baby pictures. Set them out for the rest of the week.

At the bottom are six laminated ovals that you can use to write (with an erasable marker) the dinners the birthday person would like for the week leading up to their birthday. Lastly, in the corner is a cute piece of birthday cake that has been laminated where you can write the birthday persons choice for a birthday dessert.

While it may take a little bit of work initially, it can be used for YEARS! The ideas are simple to include in your week, make the birthday person feel extra special and don’t cost much, if anything at all to do! I think this would be such a great project to do with a group of friends (or at a Super Saturday craft day) and while you are making one for yourself make one for a family member or friend!

What a fun idea! I love it!
I’m famous! When should I expect my first royalty check?
As soon as you share the post on Facebook, pin it on pinterest and get me 10 more followers. 🙂 Get going! J/K thanks for the idea sister of mine!