Easy Popsicle Stick DIY Paper Fans for Kids
This post may contain affiliate links, including Amazon Associate links. As an Amazon Associate, I earn from qualifying purchases at no additional cost to you. Please see my Disclosure Policy for more details.

When the summer heat kicks in, finding ways to stay cool becomes a top priority—especially for kids!
Keep Cool with a DIY Paper Fan!
Instead of listening to complaints about the hot weather, why not turn it into a fun craft project? Making DIY paper fans is a simple and creative way for kids to beat the heat while improving their fine motor skills. Plus, they’ll love designing their own unique fans to use all summer long!
This step-by-step guide will show you how to create a sturdy and functional paper fan using simple craft supplies. Whether it’s for a summer activity, a themed party, or just a fun afternoon indoors, this DIY project is a great way to keep little hands busy.
Supplies You’ll Need to Create This Paper Fan:
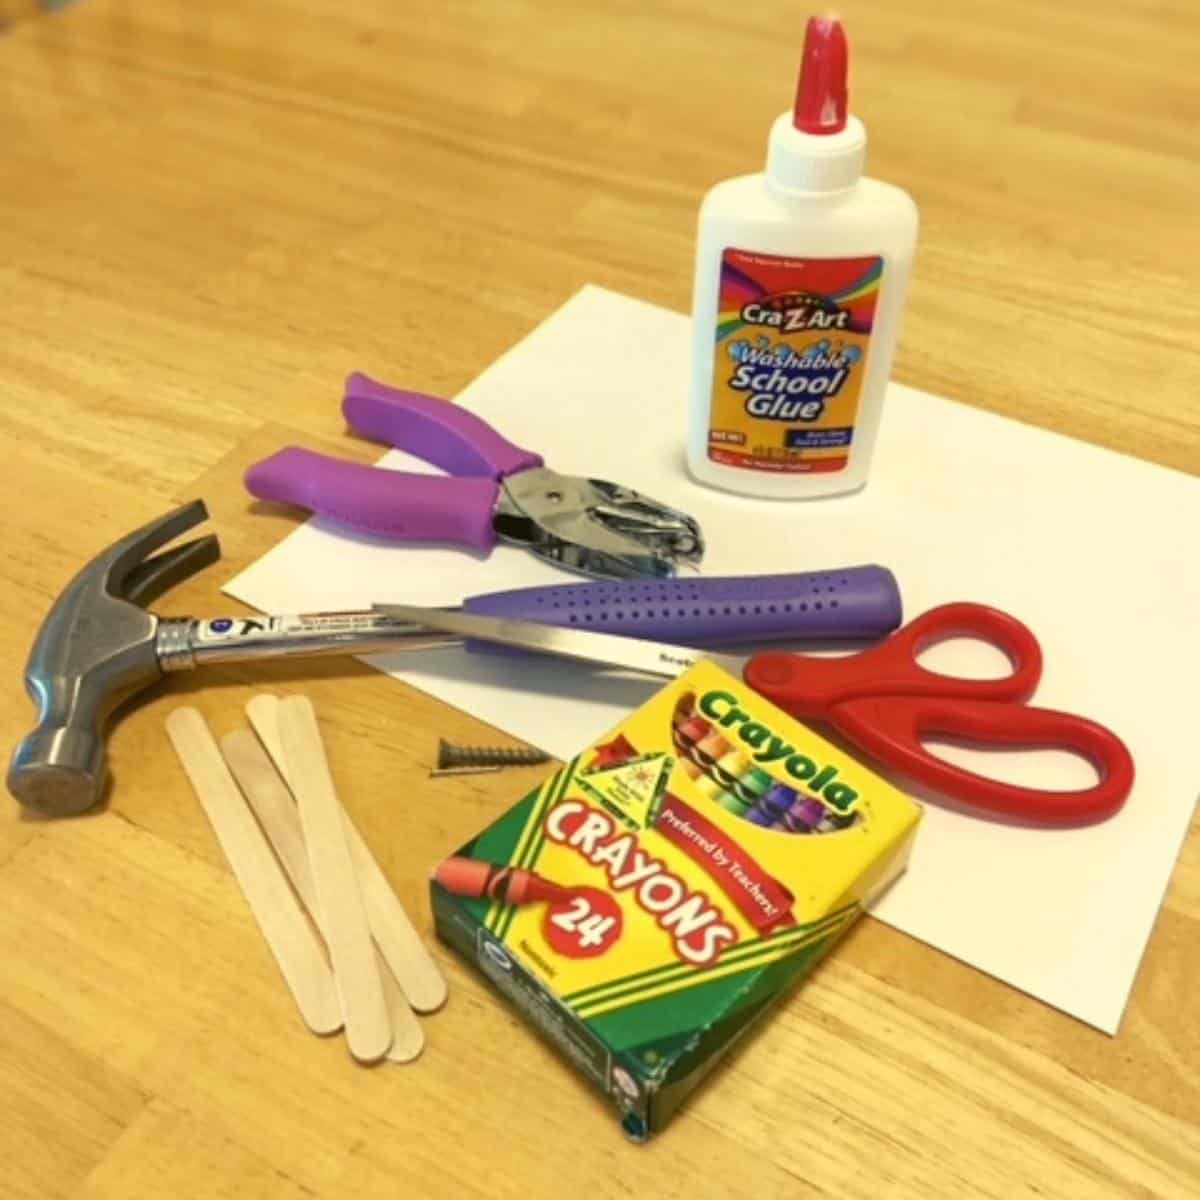
To create your own hand-held paper fan, gather the following supplies:
- Glue (I used basic school glue, but if Mom is making one for herself, a hot glue gun might be a quicker option—wink!)
- Hammer
- Screw
- Small picture nail (About half an inch long if using five popsicle sticks)
- Crayons, markers, paint, or pens
- Scissors
- 5 popsicle sticks (Use more if you want extra support)
- Hole punch
- 2 pieces of cardstock paper (Colored or plain for decorating)
- Decorative elements (ribbons, stickers, stamps, or patterned hole punches for extra flair)
Step-by-Step Instructions
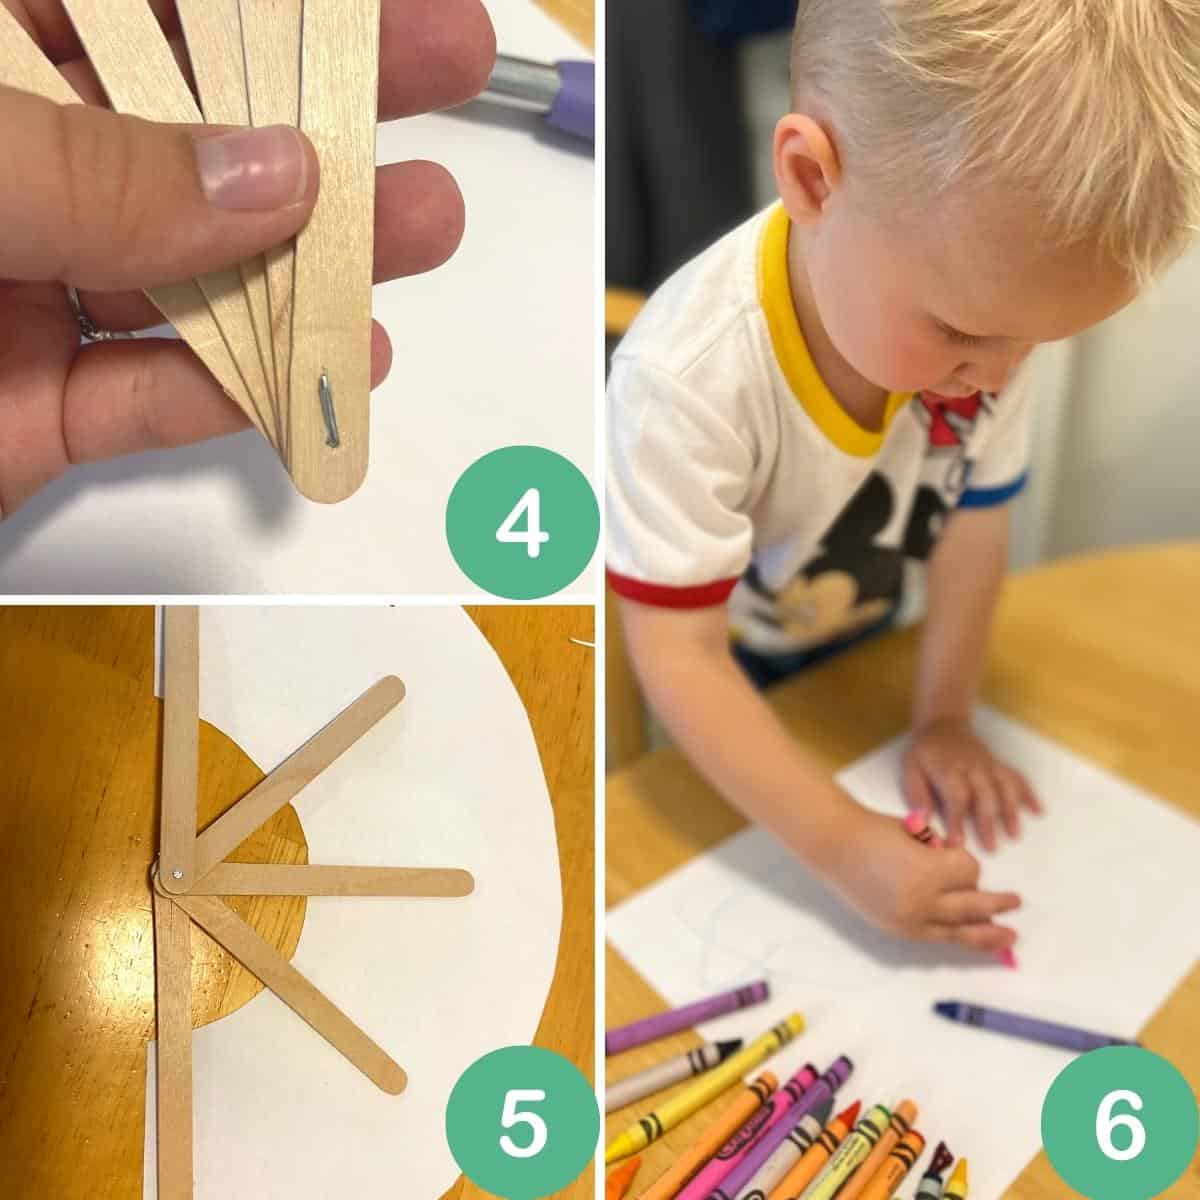
1. Prepare the Popsicle Sticks
Start by making small holes at each end of the popsicle sticks. Using a screw, twist it a few times until it pokes through the wood. Repeat for all sticks.
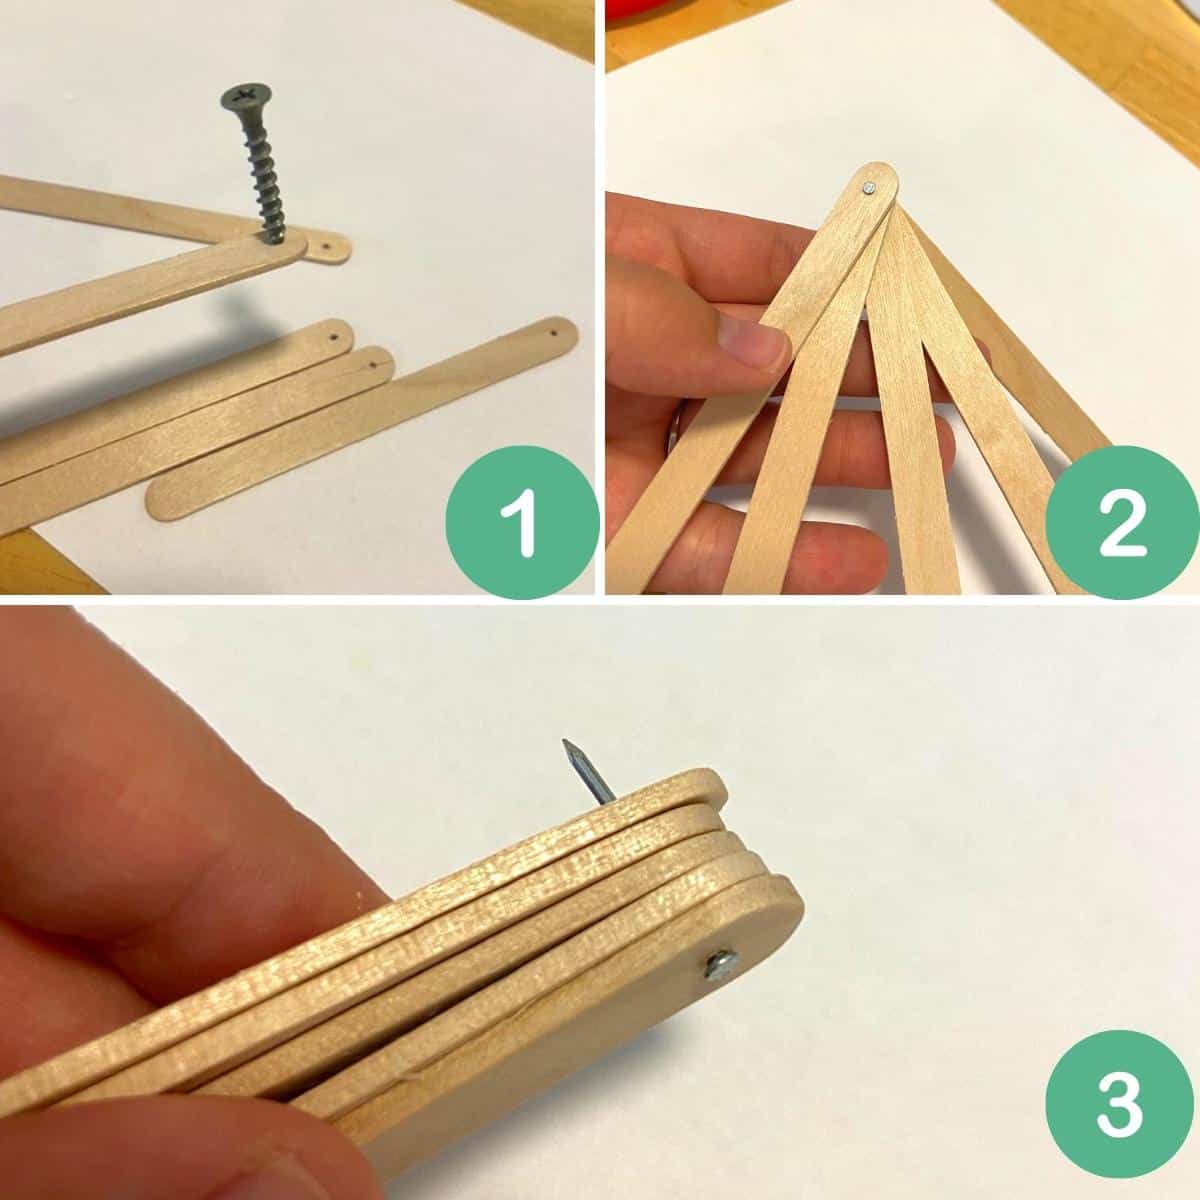
Once they have holes, stack them together and push a small nail through the holes. Then, hammer the sharp end of the nail down so that it lays flat. Make sure the sticks can still open and close smoothly, as this will allow the fan to function properly.
2. Decorate the Paper Fan
While working on the sticks, give the kids two pieces of cardstock to decorate. Encourage them to use crayons, markers, paint, or even fun accessories like ribbons, stamps, or design hole punches to personalize their fans. This is where kids can let their creativity shine!
If using paint, allow it to dry completely before moving on to the next step. This will prevent smudging and make the assembly process easier.
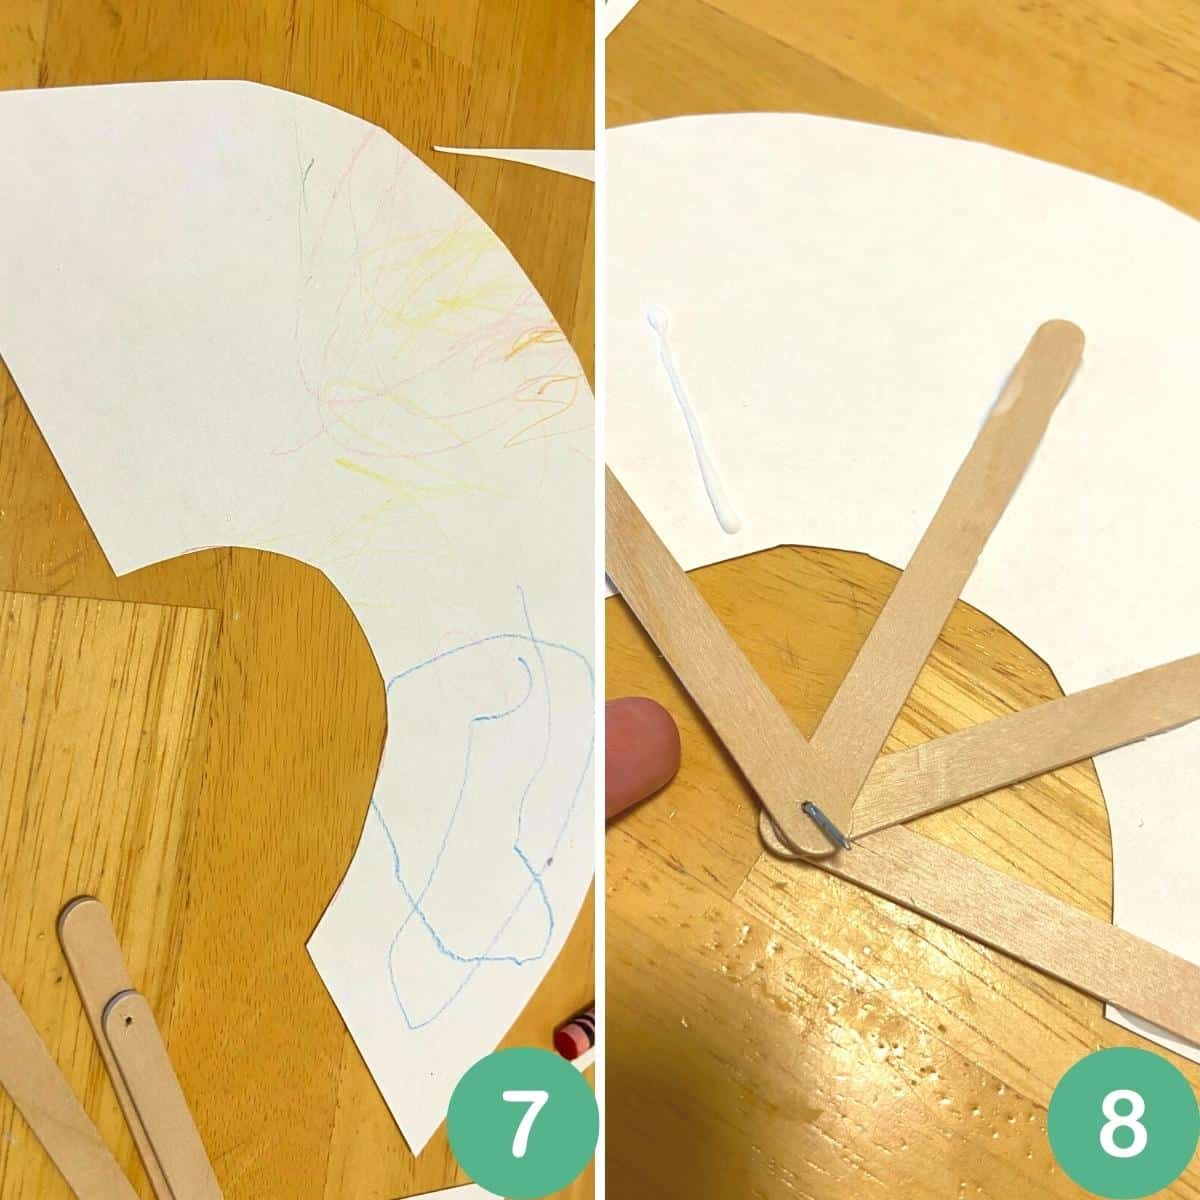
3. Cut and Assemble the Fan
Once decorated, trace a large half-circle on each piece of paper, making sure it takes up most of the page. Then, cut out a smaller half-circle at the bottom. This design allows the paper fan to fold easily while still providing enough surface area for a good breeze.
Lay the popsicle sticks on one of the paper pieces, spacing them evenly. Run a line of glue down each stick and press them firmly onto the paper. Make sure to apply enough glue to secure them but not so much that it makes the paper too stiff.
Once the first side is dry, glue the second paper piece on top to create a two-sided fan. Try to keep glue only on the sticks to help the fan fold properly. If using a hot glue gun, work carefully to avoid excess glue that might affect the folding mechanism.
4. Let It Dry
This step is crucial—allow the glue to dry completely before attempting to fold the fan. If the glue is still wet, it may leak or cause the fan to stick together. Place the fans on a flat surface and let them set for at least an hour to ensure a strong hold.
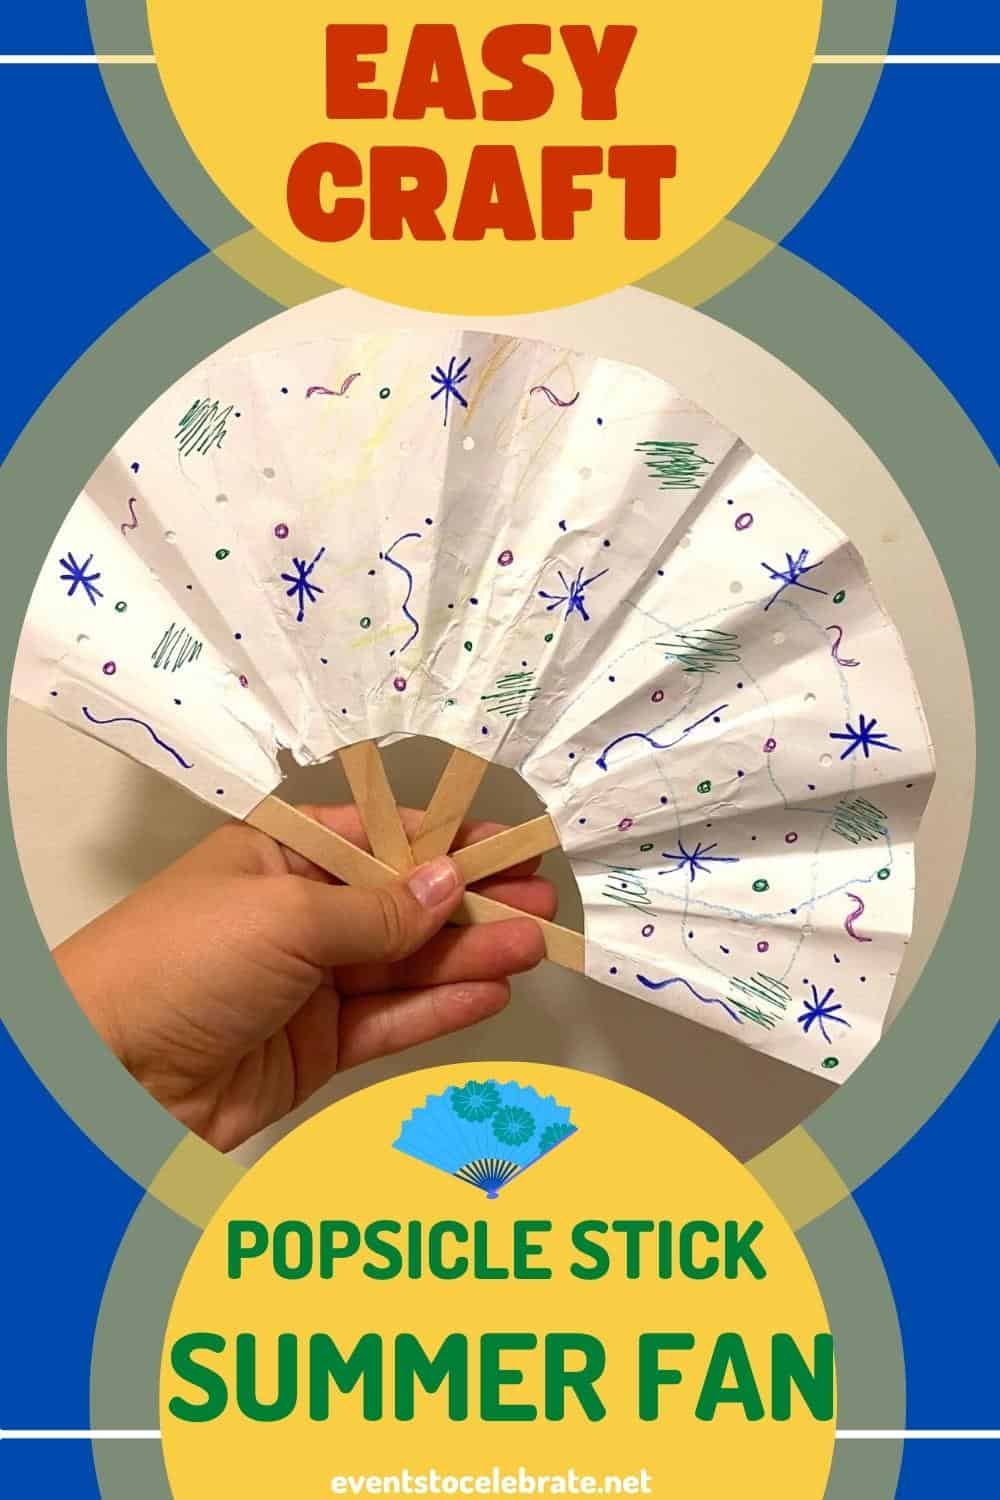
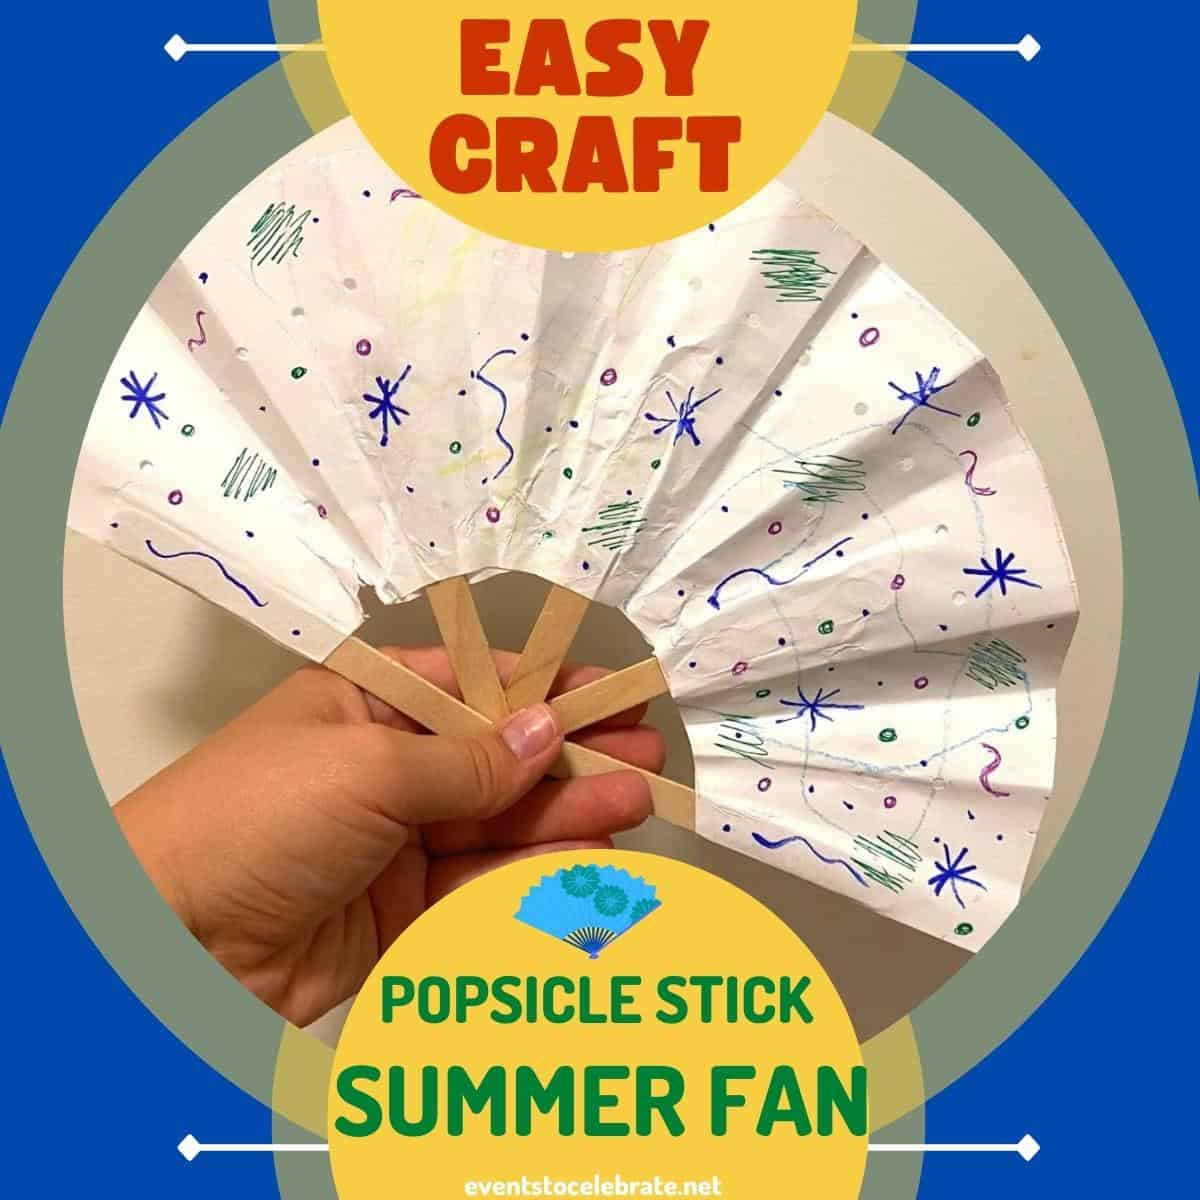
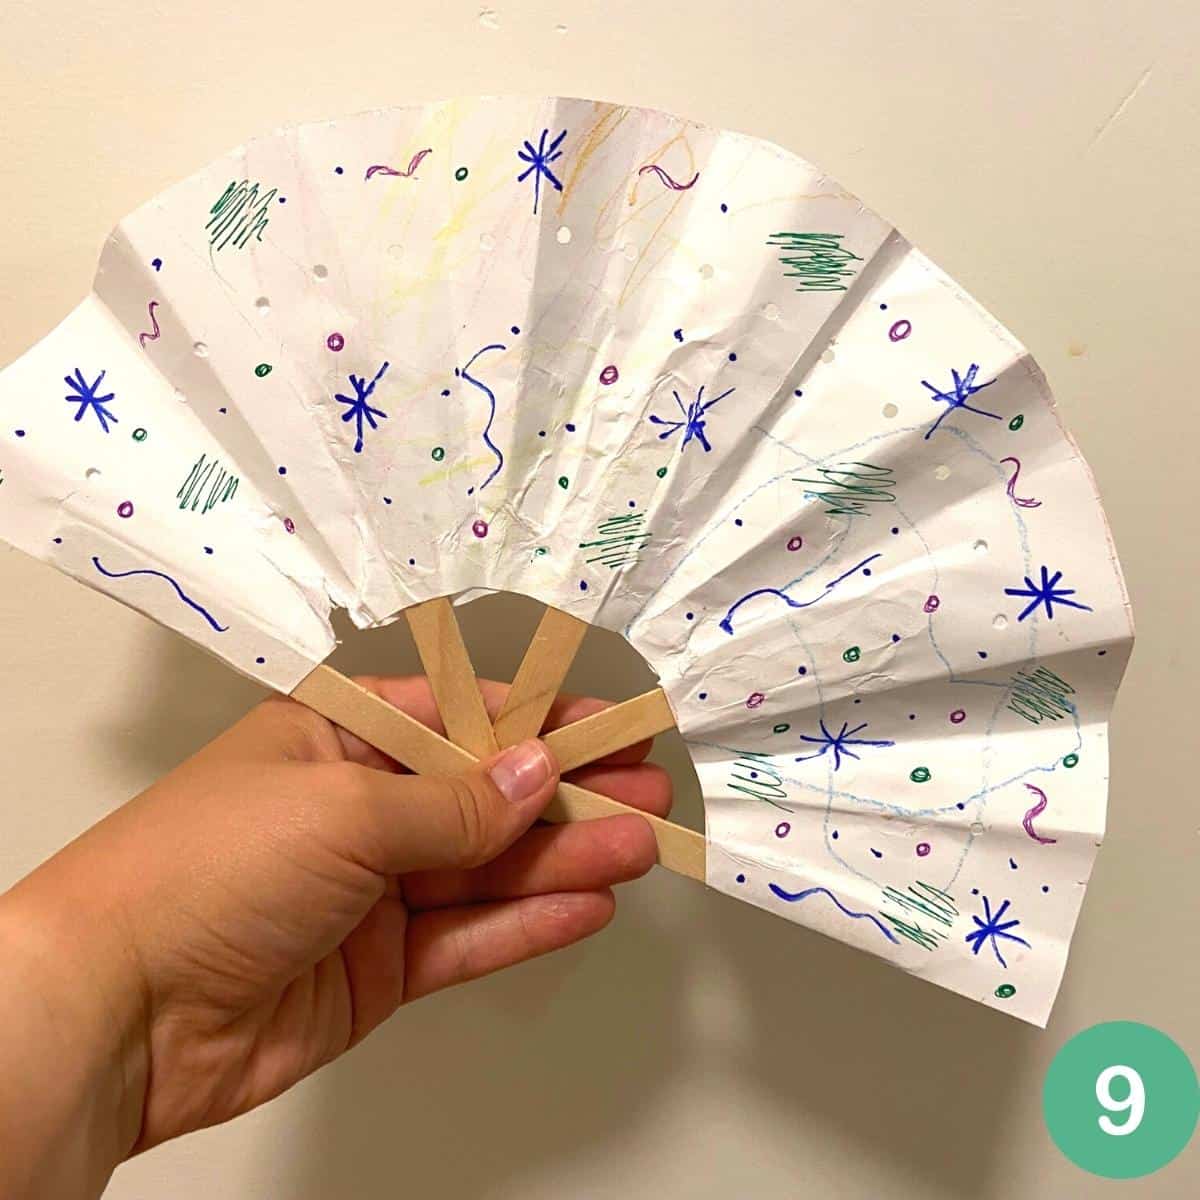
5. Fold and Enjoy!
Once dry, carefully fold the fan back and forth, ensuring the sticks stack neatly on top of each other. This will create crisp folds, making it easier to open and close. Kids will love seeing their designs transform into a functional paper fan they can use to stay cool.
Additional Tips for Success
- Keep the glue only on the sticks to prevent stiff paper.
- If using more sticks, space them evenly to maintain a smooth fold.
- Store the prepared stick base in advance for a quick activity on hot or rainy days.
- This craft can take 30 minutes to an hour, depending on how detailed the designs are—so let the kids take their time and enjoy the process!
- If the fan isn’t folding easily, gently press along the folds to crease them more effectively.
- For an extra fun twist, try making different sizes of fans or experimenting with patterned paper.
Why DIY Paper Fans Are a Great Craft for Kids
This DIY paper fan craft is more than just a way to stay cool—it’s also an excellent activity for kids to develop their fine motor skills. Cutting, gluing, folding, and decorating all require hand-eye coordination, patience, and creativity. Plus, this project encourages problem-solving as they figure out the best way to assemble their fan.
Paper fans are also a fantastic addition to themed birthday parties, summer picnics, or even as a learning project about different cultures where handheld fans are traditionally used. They make great keepsakes, and kids will love showing off their handmade creations!
More DIY Paper Fan Ideas
Want to switch things up? Try these creative variations:
- Giant Paper Fans – Use large sheets of paper and extra popsicle sticks for a bigger breeze.
- Party-Themed Fans – Decorate with glitter, stickers, or themed stamps for birthdays, parties, or summer celebrations.
- Color-Changing Fans – Use special markers that change color in sunlight for a fun outdoor surprise!
- Personalized Name Fans – Have kids write their names in fun bubble letters and decorate around them.
Share Your DIY Kids’ Craft Ideas!
I’d love to see your creative paper fans! Comment below and share your DIY kids’ craft ideas that have been a hit in your home. Let’s inspire each other with more fun projects!
By following this guide, you’ll have a fun and functional craft that your kids will enjoy using all summer long. DIY paper fans for kids are a perfect combination of creativity and practicality—so gather your supplies and start crafting today
- Kid-Friendly Halloween Porch Decorations

- 25+ Easy DIY Valentines Boxes To Make with Your Kids
- Fun & Free Super Bowl Activities For Kids
- 15 Leprechaun Trap Ideas Your Kids Will Love!
- Festive & Easy DIY Christmas Ornaments to Make Today